VICTORIAN NORDOCK CRAFTING: THE STRATEGY GUIDE v2.0
Previous Version: Crafting Guide v1
Written by Rodent
Foreword
Well, it’s 2025, and I’m still playing Victorian Nordock. How time flies!!
Given all of the recent changes, it seems an appropriate time to rewrite my original crafting guide from 2010. So once again: this guide covers all manner of crafting related stuff, such as recipes for items, where and how to collect ingredients, crafting-specific character creation, and plenty of crafting tips for beginners and masters.
Rather than providing stats of each individual crafted item, there are general properties provided for crafting materials instead. Most items derive their stats from some form of consistent raw material (e.g. Bronze metal = 5/- acid resistance for all Bronze armour and jewelry). In some cases, to find out what an item’s properties are, will require adding the properties of each ingredient together (eg ‘Copper’ + ‘Malachite’ for jewelry). The exceptions to these rules are for crafts where ingredient type doesn’t necessarily correlate with item effects (e.g. Tailoring), as well as for recipe items (which have unique ingredients and stats). For these items, individual item stats are displayed instead.
The guide itself is divided up into chapters, with reference points to each chapter containing relevant information. If some parts of the guide still aren’t clear, you can message me on Discord (The Flying Rodent) or ask me in game. This guide is version 2.0, and is written with the intention that it will be eventually translated into an in-game item. If you are reading this ‘from’ said in-game item, then I would like to point out that the online google doc version has text formatting (bold/underline/etc), which should be easier to read.
Right.
Here it is (again!).
CONTENTS
Chapter 1: Crafting System Introduction, Tools & Difficulty Ratings
Chapter 2: Crafting Stats & Characters
2.1 Beneficial Abilities
2.2 Beneficial Crafter Classes
2.3 Beneficial Crafting Races
2.4 The Four Factions
2.5. Crafting Teams
Chapter 3: Ingredients & Ingredient Locations
3.1 Flowers (and corresponding dyes)
3.2 Ore (metals)
3.3. Gems
3.4. Animals (and Leathers)
3.5. Wood
3.6. Miscellaneous Crafting Parts
Chapter 4: Navigating the Crafting System
4.1 Managing Money & Recommended Crafting Skill Order
4.2 The Chat Log
4.3 Recycling, Trash and Containers
4.4 Item Storage: Magic Bags, Mining Bags, and Mules
4.5 Passive vs Active Inventory Management
4.6 Fast Transport Options & Wings Amulet Overview
4.7 The Master Crafter’s Guild, Crafting Order Quests & Mithral Tools
4.8 The Mulrok Trade Hall
4.9 The Primary and Secondary Crafts, Recipe Consumption & Future Formatting
Chapter 5: Tailoring
5.1 Tailoring Introduction, Item Management & Skill Levelling Tips
5.2 Tailoring Item Recipes
Chapter 6: Tanning
6.1 Tanning Introduction & Skill Levelling Tips
6.2 Tanning Item Management
6.3 Tanning Recipes
Chapter 7: Mining, Smithing and Weaponcrafting
7.1 Mining/Smithing/Weaponcrafting Introductions, Item Management + Skill Levelling Tips
7.2 Weaponcrafting Metal Properties & Recipes
Chapter 8: Armour Crafting
8.1 Armourcrafting Item Management + Skill Levelling Tips
8.2 Armourcrafting Metal Properties & Recipes
8.3 Synergy Sets
Chapter 9: Gemcutting and Jewelery
9.1 Gemcutting/Jewelrycrafting Introductions, Item Management + Skill Levelling Tips
9.2. Gemcutting and Jewelry Item Stats & Recipes
Chapter 10: Tinkering
10.1 Tinkering Introduction, Item Management + Skill Levelling Tips
10.2 Tinkering Recipes
Chapter 11: Bowyering
11.1 Bowyering Introduction, Item Management + Skill Levelling Tips
11.2 Bowyering Recipes
Chapter 12: Fletching
12.1 Fletching Introduction, Item Management + Skill Levelling Tips
12.2 Fletching Recipes
Chapter 13: Deity Quests, Weekend Quests & Epic/Uber Smith Items
13.1 Deity Quest Item Intro
13.2 What is a ‘Weekend’?
13.3 Fixed Deity Quest Rewards
13.4 Upgrading Items
13.5 Preferable Items to Upgrade
Chapter 14: The Wings Quest
14.1 Looted Wings Quest Items
14.2 Crafted Wings Quest Items
14.3 Fighting Blackavar
Chapter 1: Crafting System Introduction, Tools & Difficulty Ratings
Victorian Nordock contains an ‘old’ crafting platform (i.e. around the same age as the game that it exists within) known as ATS (Ambrosia Tradeskill System). ATS crafting skills are independent from the Craft Armour/Weapon/Trap skills, and are not linked to character experience. Crafters improve ‘ATS skills’ by practising them; the higher their skill(s), the more types of items they can make.
ATS crafting skills are divided into Secondary and Primary skills. Secondary skills include Mining, Blacksmithing, Tanning and Gemcutting, and are mainly concerned with the production of components for other crafted items. Primary skills meanwhile include Tailoring, Weaponcrafting, Armourcrafting, Jewellery, Tinkering, Bowyering and Fletching. Progress in all of these skills can be checked using the Tradeskill Progress Journal from the inventory. If the journal happens to have been accidently sold/dropped/lost, the server grants a new one on log in, so relogging should replace it.
Crafting stations and resources can be found in several places around Victorian Nordock (for more info on locations, see Chapter 3). There are also various types of crafting merchants, who are usually located closest to the stations to which they service. Crafting merchants sell basic tools/ingredients, basic recipe books, and often will give a few starting points in a specific skill.
There are several types of Tools available to a crafter, which can either be used to gather a resource, create an item, or both. In most cases, gathering a resource involves clicking on the desired resource with the necessary tool equipped. Basic (Copper) tools are available for purchase from crafting merchants, and most tools can be crafted via Weapon Crafting. Lower quality tools break easily: The more difficult the metal used to make the tool, the higher quality the tool is, and the less chance that it will break. Crafted tools range from Copper to Shadow, and there are some special Mithral tools available to Master Crafters, for completing Crafting Order Quests for various NPC’s (see Chapter 4.7 for more info).
The tools available to a crafter are:
- Mining Pickaxe: Used to gather raw ore/gems from mineral deposits.
- Skinning Knife: Used to skin animals.
- Smithing Hammer: Used to craft items at an anvil.
- Paring Knife: Used to craft bows at a bowyer’s rack.
- Fletching Knife: Used to craft arrows at a fletching desk.
- Gemcutting Chisel: Used to cut rough gems. Use/activate the item to begin cutting.
- Tinkering Tool: Used to craft items at a tinkering device.
- Tailors Dagger: Used to craft items at a tailor’s table & gather flowers.
- Woodsman’s Axe: Used to chop wood from trees.
- Sewing Kit: Used to sew. Use/activate the item to begin sewing.
There are also 5 ‘Crafting Blades’ that can only be purchased as Shadow Iron variants: Tailors Blade, Skinning Blade, Paring Blade, Fletching Blade, and Tinkering Blade. These are ‘non-Dagger equivalents’ of their respective Dagger counterparts (which can be crafted), and allow large-skinned races (such as Minotaurs) to use these crafting tools, as they otherwise cannot wield tiny weapons. The Tailor’s Blade and Fletching Blade are more expensive than the others, as they come with additional functions: The Tailor’s Blade can be used to rename Bags of Holding (see Chapter 4.4), whilst the Fletching Blade can convert animal parts into Essences (see Chapters 3.6 and 12.2).
It’s worth noting that the Mining Pickaxe, Smithing Hammer, Woodsman’s Axe and the ‘Crafting Blades’ are all MARTIAL WEAPONS, and thus crafter characters will require the Martial Weapon Proficiency feat in order to use them. This feat can be selected at level 1 by most classes if it isn’t received automatically. Some classes, such as Druid and Shifter, cannot select this feat, and so other classes must be taken to gain access to it. More info on Crafter Characters can be found in Chapter 2.
When crafting, items are color-coded to indicate the relative difficulty of crafting them — from red (most difficult) to dark blue (moderate) to light blue (easy) and finally to green (easiest, success rate = 100%). Crafting a red item almost always results in a skill increase upon success, but success is rare. The most efficient skill gains (based on effort required) come from crafting dark and light blue items. Crafting a green item will never produce an increase in skill level. NOT ALL CRAFTED ITEMS EVER REACH A GREEN RATING, even with maximum skill in a particular craft. Some crafted items may also require a recipe to be crafted, which can be found in loot drops (see Chapter 4.9 for more info).
It is worth noting that difficulty rating/colour is what determines whether or not skills are gained when leveling crafting skills, and NOT the amount of ingredients required to make a specific item. Thus, it is best to make items that require the least amount of ingredients when leveling up. Recipe/special items use up more ingredients than standard items do. Unfortunately, there are instances where complex items are the only items available that will increase skill level, and there is no choice but to gather lots of ingredient types to level up a craft (Tinkering is one such example, see Chapter 10 for more info).
So, given all of this … why should one bother crafting at all? Well, here are some of the ‘highlight’ items that crafting has to offer:
Tailoring & Tanning: Haste Robes, Knockdown Immunity Robes & Belt, Spell Resistance Cloak, Mining & Magic Bags.
Mining, Smithing & Weaponcrafting: +4 melee weaponry & tools for all other crafts.
Armour Crafting: Haste & Knockdown Immunity Medium/Heavy Armour + Helmets + Shields.
Gemcutting & Jewelrycrafting: +4 ability boosting rings/amulets of all types.
Tinkering: Powerful disabling + transportation-focused magic items.
Bowyering: The best Longbow available on Victorian Nordock.
Fletching: The best Ammunition available on Victorian Nordock (by a significant margin).
Mining + Smithing + Tanning + Gemcutting + Weaponcrafting + Armourcrafting: The Wings Amulet, one of the most sought after items in Victorian Nordock, capable of transporting the user in an instant & establishing neutrality between Underdark characters & Surfacer NPC’s.
That’s the ATS system in a nutshell. Simply grab some tools, collect some resources, and then craft things at crafting stations with said resources (using as little resources as possible to level up), until red items become green ones. Easy! All that’s left now is to jump right in, with whatever character you want, and then start any craft that you like. Right?Well, whilst you ‘can’ just jump into any craft that you like, with any character that you have, this is Neverwinter Nights; a D&D-based game full of min-max’able stats! And it so turns out that:
- Certain characters are more suited to crafting than others,
- Certain crafts are more beneficial to begin a crafting journey with than others,
- Certain techniques are more useful for resource gathering and item management than others.
Thus, before diving into the crafting system, it is first worth considering: What sort of crafter (or crafters) should you make, and why?
Chapter 2: Crafting Stats & Characters
2.1 Beneficial Abilities
While the ATS system is not linked to character experience, it is linked to certain ability scores, specifically Strength, Intelligence and Charisma.
Strength increases the chance of successfully mining ore and gems from a rock. It also improves the chance of succeeding when making weapons and armour, both of which are crafts that contain items that never reach green status at maximum skill level. Strength is the only ability out of the 3 in this list that affects crafting success AFTER max crafting skills have been reached, and so it is arguably the most important ability for a crafter.
Charisma improves the chance of successfully crafting jewellery, though at maximum skill level, all jewellery crafting ratings are green (unlike weapons and armour), making Charisma less of a priority for crafters than Strength.
Intelligence meanwhile improves the rate at which ATS skill gains are made in ALL crafts, and so this is an important ability to boost while leveling up. Intelligence does not affect the chance of successfully ‘making’ items in any craft, however.
Strength, Intelligence and Charisma can be boosted by spells and items. There are a number of Strength boosting items in the Epic Shop, a Strength ring from the Northern Lands shop, Strength/Intelligence/Charisma items from the Desolate Wastelands shop, lootable Intelligence rings, and crafted ability boosting jewelry of all kinds.
Boosting a particular ability is capped at +12. So, for e.g. if one’s base strength (not the modifier) without buffing is 30, the maximum Strength that can be reached via buffs & items is 42. Bull’s Strength, Eagles Splendor and Fox’s Cunning can be bought in potion form (from potion merchants such as Percy in Benzor), and can also be EMPOWERED (boosting 3-7 points instead of 2-5) or MAXIMISED (boosting 5 every time).
Because of how these abilities affect crafting: NOT ALL CRAFTER CHARACTERS ARE CREATED EQUAL. Whilst any character can ‘technically’ craft, some classes and characters are naturally more adept at it than others. For example, melee types typically have high Strength, which makes them suited to crafting weapons and armour. Wizards meanwhile typically have high Intelligence, so they can master crafting skills faster than most. Thus, it is worth considering what sort of classes are useful for a crafter and why.
2.2 Beneficial Crafter Classes
As mentioned in Chapter 1, Martial Weapon Proficiency is very important for crafters, as it allows them to use all available tools. Some classes receive this feat for free, whilst others can select it from level 1 onwards as an additional feat.
More importantly, some classes come with abilities & spells which can assist in crafting. These are:
- Barbarian: Rage increases Strength (briefly),
- Bard: Has access to Strength, Intelligence and Charisma buffs, and is also a pre-requisite for Red Dragon Disciple,
- Blackguard: Has access to Strength buffs (Note: Blackguard Bull’s Strength stacks with ordinary Bull’s Strength, as it is a character ability not a spell),
- Cleric: Has access to Strength, Intelligence and Charisma buffs, and can cast spells on unwanted rock deposits to remove them (see Chapter 7.1),
- Druid: Has access to Strength buffs, can shapeshift into forms with high base Strength (useful for carrying flowers, see Chapters 2.5 and 5.1), and can cast spells on unwanted rock deposits to remove them (see Chapter 7.1),
- Harper Scout: Has access to Charisma buffs (Note: Harper Scout Eagle’s Splendour stacks with ordinary Eagle’s Splendour, as it is a character ability not a spell),
- Monk: Lacks any stat boosts, but can swiftly move between areas, cutting down on time spent collecting resources,
- Paladin: Has access to Strength and Charisma buffs,
- Sorcerer: Has access to Strength, Intelligence and Charisma buffs, is a pre-requisite for Red Dragon Disciple, and can cast spells on unwanted rock deposits to remove them (see Chapter 7.1),
- Wizard: Has access to Strength, Intelligence and Charisma buffs, and can cast spells on unwanted rock deposits to remove them (see Chapter 7.1),
- Red Dragon Disciple: Far and away the best crafting class, gaining permanent ability boosts in the order of +2 to Intelligence, +2 to Charisma and +8 to Strength.
2.3 Beneficial Crafting Races
Next, there is Race. Technically any race can become a crafter, and generally speaking, racial bonuses have a minimal impact on crafting success. That said, there are some races and subraces worth taking note of, mainly due to their bonuses/penalties to Strength, Intelligence and Charisma.
Racial bonuses & penalties are permanent, and impact the overall stats that a character can achieve. Notable races include:
- Half Orcs receive a +2 Strength bonus (making them slightly more suited to mining/armour/weapons) and a -2 Intelligence and Charisma penalty (making them slightly slower at levelling up crafts, particularly jewelry, compared to other races),
- Dwarves receive a -2 charisma penalty (making them slightly slower at levelling jewelry compared to other races),
- Gnomes and Halflings receive a -2 strength penalty (making them slightly less suited to mining/armour/weapons compared to other races).
Subrace bonuses meanwhile are temporary, and only come into effect in the event that a crafter character does not have sufficient buffs/equipment to boost their abilities to +12 (which is still helpful none the less!). Subrace penalties however are effectively permanent (just like with race), in that they impact the overall stats that a character can achieve, due to the +12 ability boost cap working independently of penalties. So for example, a race with a -2 subrace penalty to Charisma can effectively only boost their Charisma to +10 (12 – 2 = 10), and so a ‘temporary’ -2 Charisma subrace penalty can be treated similarly to a ‘permanent’ -2 Charisma racial penalty.
Notable Subraces include:
- Azer (Dwarf) receives a temporary +2 strength bonus,
- Duergar (Dwarf) receives a -2 Charisma penalty ‘on top of’ the dwarven Charisma penalty (jewellery is quite challenging for them, but still doable!),
- Drider and Drow (Elf) receive a temporary +2 Intelligence and Charisma bonus,
- Sun Elf receives a temporary +2 Intelligence bonus,
- Wild Elf receives a -2 Intelligence penalty (slightly slower at levelling up crafting skills),
- Wood Elf receives a temporary +2 strength bonus, but also a -2 Intelligence and Charisma penalty (slightly slower at levelling up crafting skills, particularly jewelry),
- Pixie receives a temporary +2 Charisma bonus,
- Deep Gnome/Svirfneblin receives a -4 Charisma penalty (which is ironic, given their affinity with gem mining!),
- Rock Gnome receives a temporary +2 Strength bonus (it should be noted that this is temporary & doesn’t cancel out the permanent -2 Gnome penalty to Strength),
- Ghostwise Halfling receives a -2 Strength penalty ‘on top of’ the Halfling Strength penalty (making them the worst race at mining/weapons/armour & arguably the worst crafting subrace overall),
- Goblin receives a temporary +2 Strength and Intelligence bonus (doesn’t cancel out the permanent -2 Halfling penalty to Strength), as well as a -2 Charisma penalty,
- Kobold receives a temporary +3 Charisma bonus,
- Sprite receives a temporary +2 Charisma bonus,
- Strongheart Halfling receives a temporary +2 Strength and Intelligence bonus (doesn’t cancel out the permanent -2 Halfling penalty to Strength),
- Half-Drow receives a temporary +2 Strength and +3 Intelligence bonus, as well as a -2 Charisma penalty,
- Shadow receives a -2 Strength penalty,
- All the Half Orc subraces (Bugbear, Lizardfolk, Minotaur, Ogre) receives temporary bonuses to Strength, alongside penalties to Intelligence and/or Charisma (so be prepared to deal with slower skill leveling, in addition to the need to buy Crafting Blades for the larger races!),
- Aasimar receives a temporary +2 Charisma bonus,
- Tiefling receives a temporary +2 Intelligence bonus, but also a -2 Charisma penalty.
2.4 The Four Factions
Finally, by selecting different races, characters are placed into certain factions, with different starting locations & access to resources.
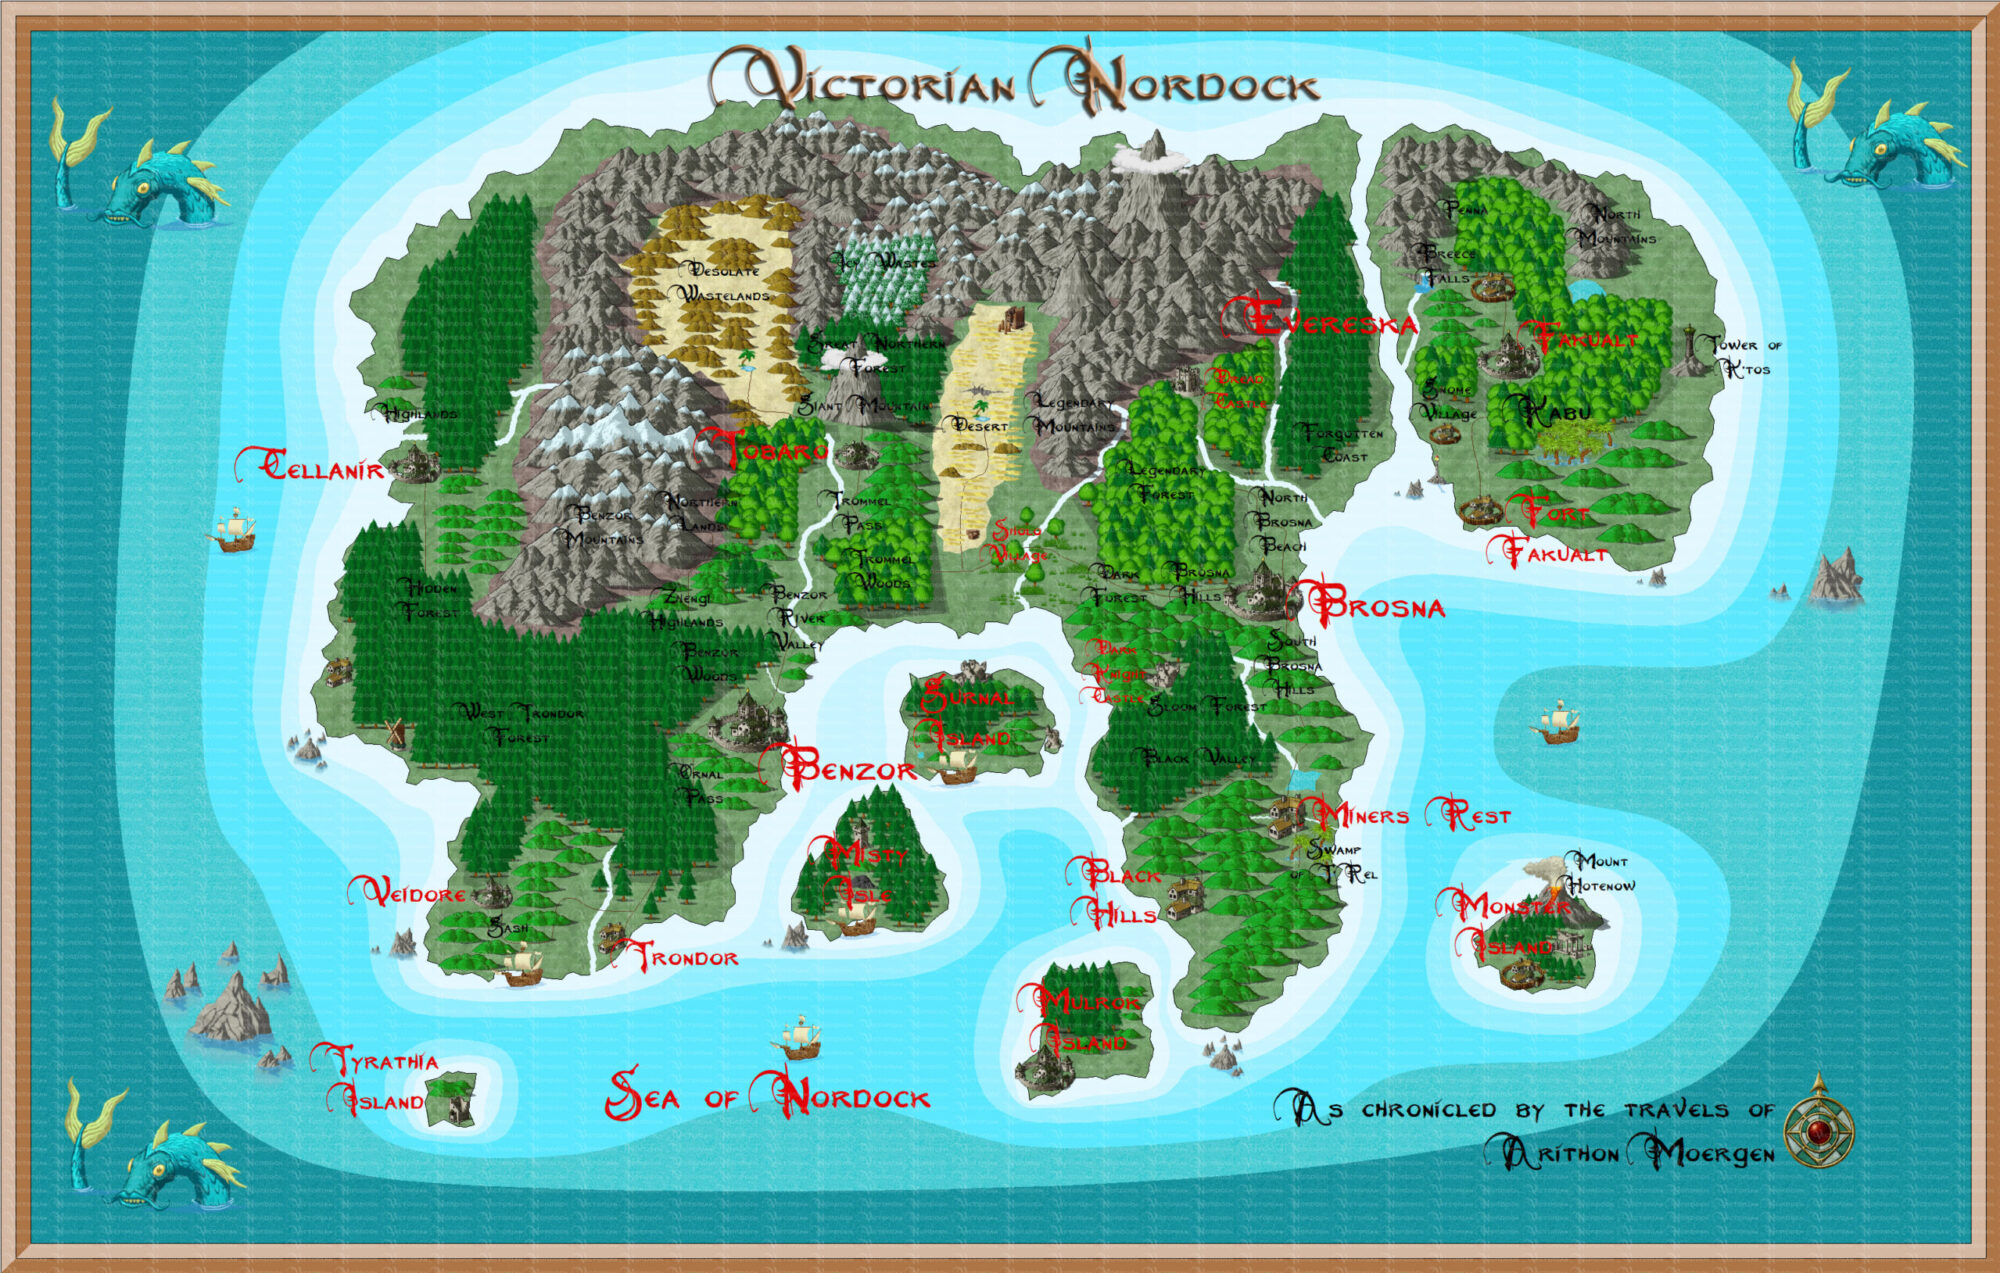
The first & default faction are the Surfacers, which include ‘any non-subrace’, as well as most of the subraces that are available. Surfacers spawn either in Benzor or Mulrok (which is a free boat ride to Benzor), and have the most widely available access to crafting resources (as most of Victorian Nordock is on the surface), including Benzor + its surrounds, the several animal spawns south of Brosna, and the large mines within Black Hills. For a crafter just starting out on Victorian Nordock, it’s hard to go wrong with a Surfacer!
Related to Surfacers are the Evereskans. This faction includes Sun Elves, Wild Elves, Wood Elves, Pixies, and Sprites. Evereskans are allied with Surfacers and can use their transport system/merchants without issues, but instead spawn in the secluded forest city of Evereska. Evereskans are somewhat advantaged in the areas of Tailoring and Bowyering, as their flowers & wood are available within various parts of the Evereskan city itself (and not out in hostile territory). For other resources however, they typically have to travel to other surface towns, such as Benzor or Brosna.
There are also 2 factions that are not allied with the surface, and instead live within the Underdark. The most prominent of these are the Drow, who include the Half Drow and Drider as their kin. Drow reside in their 3 Underdark settlements (Underdark Central, Loknar to its East, and Chaullsin to its South), with safe paths to the surface found within Loknar (Valley of Darkness + South Brosna Hills to the North, as well as a boat to the neutral Mulrok Island). Drow have access to several internal mines & animals/plants via their connection to the surface, but their main advantage is their massive Gem Mine within Chaullsin. More details on this mine in Chapter 9.1.
Finally, there is the Duergar. The Duergar are an odd race of reclusive Dwarves, residing within a little southern pocket of the Underdark in Gracklstugh. Their city and trading architecture is somewhat confusing and inefficient (just the way they like it!), though they do have a functional crafting setup, including a boat to a surface outpost within the Icy Wastes (which is far north of Tobaro & Giant Mountain) that includes various trees & animals. The Gracklstugh Mine also has a couple of quirks: gems and metals tend to spawn together, and mineral deposits here are around twice as ‘rich’ as standard mineral deposits (ie ‘take twice as many hits to destroy’). Not that having ‘hardier minerals deposits’ changes much, as there are arguably larger mines with more deposits available to the other races, but it is an interesting quirk for Duergar none the less!
2.5. Crafting Teams
While it is technically possible to make any particular character achieve 400 in every primary & secondary crafting skill, it can be a good idea to have multiple characters who are honed at particular crafting skills. High Strength brutes for example may not have the highest intelligence or Charisma (making them not ideal for jewelrycrafting), but they are superb miners. Certain ingredients are also more suitably gathered by low strength characters (e.g. flowers, see Chapter 5.1) which are otherwise not suited to crafting in general. And whilst it is possible to store ‘just about everything’ that a crafter makes within their own inventory given enough bags, this can quickly make said inventory become very easily cluttered and unusable.
Thus, it is beneficial to make a ‘team’ of crafting related characters. A typical crafting team would look something like this:
- A RDD master crafter. A high Strength build (with perhaps decent Intelligence and/or Charisma as well) designed to master all primary crafts. This guide recommends the ‘Arcane Pioneer’ build (Wizard/RDD) from the Builds Forum on the Victorian Nordock website (victoriannordock.com) as a ‘starting’ master crafter, which can potentially be played & levelled by any faction (Surfacer/Drow/Duergar/Evereskan), and is designed to operate with minimal equipment (which is ideal for a starting character!). Otherwise, something like a Cleric RDD with mixed stats can also make for a good crafter, as they can hold their own as well as craft. Both Wizards and Clerics pack spells which can remove rock deposits (see Chapter 7.1).
- A flower picker. This is essentially a purposefully ‘low Strength’ character with 2 Tailors Daggers equipped, that is designed to pick flowers. Flower plants (see Chapter 3.1) have limited HP, so gathering flowers with a high Strength character leads to plants getting quickly destroyed. Gathering flowers with a low strength character meanwhile (i.e. anyone with 8 strength or under, Gnomes and Halflings can get as low as 6) allows multiple flowers to be obtained from the same bush without destroying it. Low Strength characters can also use Woodsman’s axes to collect more wood from Yew trees than a high Strength character can (see Chapters 3.5 and 11.1). This guide recommends the ‘Florist Assistant’ build (Druid/Monk, found in the same post as the Arcane Pioneer mentioned earlier) as a dedicated ‘flower picker’.
- At least one ‘Item Mule’ character. Item mules are usually high Strength level 1 characters with lots of bags (see Chapter 4.4), and are designed to hold crafted items in reserve. This type of character is very handy for crafters, who can offload items that they wish to keep & thus maintain a more tidy inventory themselves.
- (optional) A secondary miner character. This could be a Half Orc RDD (maximum 44 base strength) or a Drow RDD (maximum 42 base strength) specifically honed at mining gems in the Chaullsin gem mine (see Chapter 9.1). This character should be given lots of mining bags, and specialise in Mining and Smithing (and perhaps Weapons and Armour as well).
- (optional) A ‘rock destroyer’. In the event that a master crafter and/or secondary miner is unable to remove rock deposits with spells, a ‘rock destroyer’ can be brought in specifically for this task. Harm (Cleric/Druid) + ‘punching the rock’, Destruction (Cleric), and Wail of the Banshee (Wizard/Sorcerer) can all be used to remove rock deposits. See Chapter 7.1 for more info.
- (optional) A ‘Yew collector’. Yew collection, like flower picking, is best done on a character with low Strength. However, Yew is slightly further out of the way than flower bushes & typically requires fighting ‘teen level enemies’ to reach (e.g. Fire Giants, see 3.5 for locations). Thus, a ‘Yew collector’ character could simply be the same character as the flower picker (but with enough levels to consistently clear teen-level spawns), or alternatively it could be a different high level character with low strength, plenty of bags & a pair of Woodsman’s Axes (which require Martial Weapon Proficiency to wield). Yew collection is best done with ‘moderate’ strength (around 20-24 either with or without buffs), as Yew trees have a little bit more damage resistance than flower bushes do, which needs to be overcome in order to collect Yew.
- (optional) Specialised Ingredient Gatherers. These could simply be standard characters who happen to excel at collecting particular ingredients (e.g. Dev Crit characters for collecting Dragon parts), who can then transport these back to a crafter. It is worth noting that some creatures only spawn at particular levels (Bodaks and Skeletons in particular), so it might be worth having some ‘ingredient gatherers’ parked at certain levels, to harvest these ingredient types. More info on Miscellaneous Ingredient Parts in Chapter 3.6.
Once a crafter character (or characters) have been sorted, the next thing to consider then is: Where to start?
Well, to begin any craft, you must further gather some ingredients. This guide recommends Tailoring as the first craft that should be attempted and mastered, and so information presented on ingredients (and later secondary and primary crafts) uses Tailoring as a starting point. Which means that flowers are first up! (Hope you have a flower picker handy!)
Chapter 3: Ingredients & Ingredient Locations
3.1. Flowers (and corresponding dyes)
Flowers are the primary ingredient used to manufacture dyes, which are then used in Tailoring to make other items. The majority of Tailoring skill can be levelled through simply converting flowers into dyes, which makes Tailoring a great place to start crafting!
Flowers are collected using Tailors Daggers. Grab a low Strength character with enough firepower to kill low level critters, equip two Tailors Daggers, and then hack at a flower bush of choice. Tailor’s Daggers will not break while harvesting flowers (though they do break when being used at a Tailoring Table). Once enough flowers of a certain type have been collected, they can be transported back to a crafting station and placed in a container or bin, whereafter a crafter character can then pick them up & convert them into dyes. For more info on this, see Chapter 5.1.
Types of Flower & Dyes (in order of increasing difficulty):
- Iris (Aqua)
- Orcish/Bugbearish/Fisherman’s Brewer (Black), produces the dye itself rather than the flower.
- Ageratum (Blue)
- Sunflower (Brown)
- Snapdragon (Bronze)
- Marigold (Gold)
- Summer Savoury (Gray)
- Spearmint (Green)
- Tarragon (Lime)
- Nasturtium (Maroon)
- Cornflower (Navy)
- Chives (Olive)
- Petunia (Purple)
- Geranium (Red)
- Dusty Miller (Silver)
- Forget-Me-Not (Teal)
- Alyssum (White)
- Everlasting (Yellow)
It’s worth noting that crafted dyes are NOT the same as the dyes that can be bought from dye merchants. As such, they cannot be used to dye clothing directly, and are purely used for crafting.
Flower Locations (Surfacer): Benzor Flats, Benzor River Valley (Orcish Brewer for Black dyes), Eastern March (the 3 maps east of Benzor).
Flower Locations (Evereskan): Harbour, City (Fisherman’s Brewer for Black dyes), High Vale (all contained within the city).
Flower Locations (Drow): Valley of Darkness (Bugbear’ish Brewer for Black Dyes), Gloomy Woods (1 map above Loknar and then 1 map south).
Flower Locations (Duergar): Icy Wastes (Orcish Brewer for Black Dyes), Forests of Klath (boat to Duergar Outpost, 2 maps east to Icy Wastes, 1 map south to Forest of Klath).
3.2 Ore (metals)
Ore is mined from mineral/rock deposits, using a pickaxe. To mine a rock, click on the rock with a pickaxe (or pickaxes) equipped. Once a rock has been clicked, the crafter character will return to mining the rock once every 6 seconds until the deposit is destroyed. With special mining bags, crafters can be left on their own to mine and bag their ore until the deposits are destroyed. Mining bags can be crafted in Tailoring and Tanning (see Chapters 5.2 and 6.3).
Higher Strength and higher mining skill means a greater chance of chipping off an ore. Doing more damage (as in ‘non-strength related damage’) to the rock alone will not increase the chance of mining an ore (so there is no point ‘buffing a pickaxe’ as it does nothing). Crafted pickaxes range from copper to shadow, and special near-unbreakable Mithral pickaxes are sometimes offered as rewards for Master Crafters completing Crafting Order quests (see Chapter 4.7).
Types of Ore (in order of difficulty):
- Copper
- Tinstone/Bronze
- Iron
- Silver
- Gold
- Shadow/Black Iron/Shadow Iron
- Verdicite
- Rubicite
- Syenite
- Mithral
- Adamantine
- Myrkanite
Ore can be found in a variety of places. Each Ore typically contains ‘45 opportunities to mine ingots’, though this will depend on the crafter’s success at mining a particular ore, as well as its mining difficulty. Ores from Shadow onwards have less than a 100% chance of being mined at 200 Mining skill.
Here are some of the main Ore locations for each faction.
Main Ore Locations (Surfacers):
- Benzor Woods (North, contains mainly beginning metals)
- Black Hills (Boat from Benzor, contains all metals. There are 5 side caverns, the first 2 heading clockwise from the door are copper to gold, the next two shadow to syenite, the last mithral to myrkanite)
- West of Miners Rest
- West of Lake Wojone (North of Miners rest)
- Many of the Guild Halls
Main Ore Locations (Evereskan):
- Evereskan Mine (north of the High Vale, similar layout to Black Hills)
Main Ore Locations (Drow):
- Loknar
- Chaullsin
- Scattered around the Underdark on random maps.
Main Ore Locations (Duergar):
- Gracklstugh Mine (worth noting that deposits in this mine are more than 2x as durable, with 100 opportunities to mine ingots!)
- Scattered around the Underdark on random maps.
3.3. Gems
Gems are mined from mineral/rock deposits, using a pickaxe, via a similar action to Ore (see Chapter 3.2). Higher Strength and higher mining skill means a greater chance of chipping off a rough gem. Rough gems can then be cut into cut gems, using a gemcutter’s chisel. To use a gemcutter’s chisel, activate its special power. Gemcutter’s chisels can be purchased from merchants, or crafted via Weaponcrafting (up to Shadow, see Chapter 7.2).
Types of Gems: (in order of increasing difficulty)
- Malachite
- Amethyst
- Lapis Lazuli
- Turquoise
- Opal
- Onyx
- Jade
- Pearl
- Sapphire
- Black Sapphire
- Fire Opal
- Ruby
- Emerald
- Diamond
Gem Locations (Surface):
- Black Hills
- South of Brosna
- Glittering Mines of Makanor (near Sholo)
- Misty Island Caves
- Many of the Guild Halls
- Benzor Fair Mine (contains Diamond and Myrkanite, which are used to craft diamond myrkanite rings, the best item to make to level the final levels of gemcrafting skill)
- Evereskan Mine
Gem Locations (Drow):
- Loknar
- Chaullsin (Huuuuge Gem Mine, may be worth making a drow gem miner character just to access this mine. The side caverns at the east, northern and western edges contain high end gems. See Chapter 9.1 for more info)
Gem Locations (Duergar):
- Gracklstugh Mine (nestled alongside metals),
- Scattered around the Underdark on random map)
3.4. Animals (and Leathers)
Leathers are skinned from animals. To skin an animal, loot the animal’s corpse with a skinning knife equipped (for more info see Chapter 6.2). The facilities to cure, tan and harden leather are the Smoker’s Oven and the Water Basin. The tanning merchant sells tanning recipes, as well as the components required to cure, tan or harden hides.
Types: (in order of increasing difficulty)
- Badger (Small)
- Deer (Medium)
- Cougar (Medium)
- Brown/Grizzly Bear (Large)
- Black Bat (Small Black)
- Panther (Medium Black)
- Black Bear (Large Black)
- White Stag (Small White)
- Winter Wolf (Medium White)
- Crag Cat (Medium White)
- Polar Bear (Large White)Badgers, Deer, Grizzly Bears and Black Bats are the most common animal types, and are also the most commonly used hides in crafting. The other animals/hides tend to be more rare, but are only used as components for a handful of items.
Main Animal Locations (Surface):
- East of Benzor (flats, valley, eastern march and hunting fields northeast of Benzor)
- North of Benzor (Woods, Northern Pass Trade Road and Durel River)
- South of Benzor (Road, Bria’s Fay)
- Several Mines (Black Bats like caves)
- South of Brosna (past the slums and into the hills. Lots of bears and deer here)
- North of Tobaro (Great Northern Forest, winter lands)
- Tobaro Pass (South of Tobaro)
- Black Hills/Valley
- Evereskan Harbour hunting fields
Main Animal Locations (Drow):
- Valley of Darkness (also close to South Brosna Hills)
- Surrounding all UD cities, in basically any direction
- Chaullsin Ore and Gem Mines (Bears/Badgers/Deer included)
Main Animal Locations (Duergar):
- Icy Wastes/Forests of Klath (good for basically ‘any animal except Grizzly bears’, badgers found in Forests of Klath),
- Duergar Caverns north of Gracklstugh (bears/deer) and Duergar Caverns East (more bears).
3.5. Wood
Wood is chopped from trees. To chop wood from a tree, click on the tree with a Woodsman’s axe equipped. Equip two woodsman’s axes for maximum efficiency. Woodsman’s Axes cannot be crafted, but they do not break. In general trees disappear faster than mineral rock deposits, but respawn a lot faster.
Types: (in order of increasing difficulty)
- Oak
- Elm
- Ash
- Yew
- Ironwood (not actually found on trees but in specific locations, labelled ‘woodpiles’, once per server reset, see Chapter 3.6 below)
Wood Locations (Surface):
- East of Benzor (Flats for Oak, Hunting Fields for Elm and Ash)
- Sholo Forest
- Evereska Harbour
- Sons of Thunder Guild Hall
- Yew: Durel River (north of Benzor), Giant Mountain (north of Tobaro)
- Ironwood: Sholo, Sangrulu’s Lair (Gurnal Island)
Wood Locations (Drow):
- Gloomy Forest (near Valley of Darkness) for Oak/Elm/Ash.
- Blood Wood (West of UD Central, then north of UD west). The first area of Blood Wood contains Oak/Elm/Ash, and the 2nd area of Blood Wood to the north contains Yew (top left corner).
Wood Locations (Duergar):
- Forests of Klath for Oak/Elm/Ash
- Ice Forest for Yew (1 sector east and then 1 north of Icy Wastes, watch out for young dragons and Ice elementals!).
3.6. Miscellaneous Crafting Parts
Finally, here is a list of miscellaneous crafting parts and some of their common locations, found either on merchants, specific monsters or in containers:
- +1 Weapons and Standard Weapons: Loot Drops or Weapon Merchants, usually found in major cities (e.g. Curli in Benzor).
- Advanced Arrow Fletch: Gurnal Island, North Brosna Beach, Legendary Forest.
- Ancient Red Dragon Hearts: Fire Blasted Pass, Gash Road To Veidore (north of the Gash Mountains).
- Blackberry Gems: WINGS QUEST ITEM. Found in the Bharat Duergar Vault (Northeast side of Underdark Deep caverns, which is underneath and then southeast of Sholo, or West of Loknar). Requires a vault key to access. Key can be obtained from the dragon Renal in the Bharat Duergar sewers, in exchange for 1 Drake’s Charm of Passage (made in armour crafting). More info in Chapter 14.2.
- Black Dragon Liver: Swamp of T’rel, south of Miner’s Rest.
- Black Dragon Scales: Lower Plane of Rage, Trommel Mine.
- Blue Dragon Breath Glands: Misty Isle Blue Dragon Pass (several sectors north of the boat).
- Bodak’s Teeth: Forgotten Tomb of Heroes, Underneath Temple of Lloth. Must be around level 10-15 to spawn them, so it might be worth using a dedicated ‘Bodak collector’ (see Chapter 2.5).
- Dragon Blood: Fire Blasted Pass, Swamp of T’Rel, Plane of Rage, other ‘dragon’ locations.
- Ettercap’s Silk Glands: Benzor Woods Mine, several other mines.
- Fairy Dust: Benzor Flats, Valley of Darkness.
- Fenberries: Trommel Mines, Goblin Flats (east of Benzor).
- Fire Beetle’s Bellies: Benzor Flats, Valley of Darkness, several sewer sectors.
- Gargoyle’s Skulls: Inodrio Castle and Dungeon (on Misty Isle, final Wings Quest area), Bharat Duergar Lair, Dark Knight Castle.
- Lesser Amulet of the Master: Loot Drops, Desolate Wastelands Shop (in the tent).
- Lich Skull: Swamp of T’rel.
- Oil of Vukas: WINGS QUEST ITEM. Crafted by Percy the Potion Maker (Benzor). Requires 1 Blackened Treated Leather Pouch and 10 Blackberry Gems to make.
- Philema’s Eye: Damned Lair (north of Tobaro).
- Plague Demon Horns: Diseased Passage (south of Miners Rest), Gash North Road Cave.
- Quartz Crystal: Tetra’s Mine (near Chaullsin), Kabu Lighthouse, Kabu Mountains, Dark Forest (east of Sholo, west of Brosna).
- Rage Spider Web Spinners: Gurnal Island (1 sector east + north + west of the boat), Plane of Rage.
- Rakshasa Eyes: Kabu Cemetery, Hissing Bog (north-east of Benzor).
- Recipes: Random Loot Drops. For more info on which items require recipes as components, see Chapter 4.9.
- Red Dragon Scales: Fire Blasted Pass, Road to Veidore.
- Scrolls: Low level scrolls can be purchased from Benzor (Malk), Evereska (Vilmar), Chaullsin (Drow Witch), and Gracklstugh (Heidi). Desolate Wastelands Oasis Tent (Vrillow Hawk Master) and Kabu Gnome Village (Garl Glittergold) each sell a wide range of Wizard scrolls, and Lorea in the Tower of K’tos (i.e. ‘the exclusive Nine Hells store that requires an Asmodeus Hand to access) sells all available scrolls (which includes Flesh to Stone for Fletching).
- Skeleton’s Knuckles: Benzor Cemetery, low level crypts. Must be around level 1-5 to spawn them, so it might be worth using a dedicated ‘Skeleton collector’ (see Chapter 2.5).
- Will o Wisp Essences: Trommel Woods, Swamp of T’rel.
After some ingredients have been gathered, it should become evident that crafting requires a lot of management! Items and Chat Logs can swamp your inventory and communication with other players, making it difficult to organise things. That said, there are techniques for managing the chaos, such as the ones outlined in the next chapter.
Chapter 4: Navigating the Crafting System
4.1 Managing Money & Recommended Crafting Skill Order
Generally speaking, crafting is an endeavour that requires a bit of ‘starting capital’ in order to progress smoothly. Boat tickets and ingredients/tools cost money, and crafted items cannot be sold at regular merchants (they must instead be sold at specific merchants within Mulrok Trade Hall, see Chapter 4.8). It is recommended then that before a crafter begins their career, that they have at least a little money in reserve from adventuring or otherwise (say 10,000 gp) to spend on any materials/tools that they need to start, as well as a Haste item (e.g. Yellow Wizard’s Robe, see Chapters 4.8, 5.2 and 8.2) to quickly cover ground between areas.
Tailoring is recommended as the first primary craft that a crafter should master. This is because Tailoring can be used to produce a number of items with key stats and immunities (namely Haste and Knockdown Immunity) as well as Mining Bags (which are useful for a lot of other crafts). Creating these items only requires animal hides for Cloths (plus a little bit of tanning skill) and flowers for dyes, which are both item types that are found in lower level areas. Many tailoring items and dyes also sell for a decent amount of money at the Mulrok Trade Hall, and so Tailoring can be used both to fund future crafting activities & item purchases, in addition to setting up the crafter for success with Haste + KD Immunity + Mining Bags.
The 2nd recommended primary craft is Weapon Crafting, which can be used to make high quality tools for all other crafts, and can also be simultaneously levelled with Mining and Blacksmithing. This should be followed by Armour Crafting 3rd, which can provide crafters with Haste/KD immunity helmets/armour/shields for themselves and other future characters. Once Armour is maxed, this should be followed by Jewelrycrafting 4th, for additional ability boosting equipment (primarily intelligence/charisma/wisdom for spellcasting characters), and then Tanning 5th should be increased to the point where Blackened Treated Leather Pouches (i.e. the most difficult Tanning item and a key component for the Wings Quest, see Chapter 14) can be crafted and put to use. Tinkering should then follow 6th in order to make high end Mithral Bows strings for archers (in addition to magical supporting items), and then finally, the rest of Tanning & the remaining 2 primary crafts (Bowyering/Fletching) should be completed in any order.
In a nutshell then, the recommended order for ‘craft skill progression’ is as follows:
- Tailoring (accompanied by a little Tanning & with the help of a flower picker),
- Weaponcrafting (accompanied by Mining & Smithing),
- Armourcrafting (accompanied by a little Tanning),
- Jewellerycrafting (accompanied by Gemcutting),
- Tanning (up to around 170/200 to make all the required Wings items),
- Tinkering (required to make high end bow strings),
- The rest of Tanning + Bowyering/Fletching in any order.
4.2 The Chat Log
One thing that a crafter will quickly notice is that whilst operating crafting equipment, the chat log becomes flooded with messages, making it nearly impossible to communicate with other players. Thankfully, chat messages are classed as ‘Normal Chat’, whilst conversation with other players can take place using Party, Tells, and Shouts.
So: by right clicking on the black bar at the top of the chat log (the one with the arrow that is used to expand and contract the log), an option comes up to ‘exclude Normal Chat’ from the logs (bottom option). Exclude/Include Normal Chat turns normal chat off and on, which includes crafting messages. Tells, Party chat and Shouts are unaffected by this change, which means that with Normal Chat turned off, crafters can now talk to other people while they craft. Woohoo!
Normal Chat logs can be reset at any time by ‘including Normal Chat’ in the logs again, or by relogging the crafter character (which resets chat settings to their default). Whilst operating any crafting equipment however, it is definitely recommended to turn Normal Chat off.
4.3 Recycling, Trash and Containers
Some crafted items can be recycled. Crafted weapons, crafted armour (not including drake’s charm or copper studs), and basic tinkering components (wires, gears and widgets) can be placed back into a forge and ‘salvaged’. Salvaging returns a percentage of the original ingots back to the crafter, depending on the difficulty of the metal and the crafter’s Blacksmithing skill. It is a good idea to recycle & reuse metals whilst levelling certain crafts, such as weapon and armour crafting (see Chapters 7 and 8). Just be careful not to salvage important items!
For unwanted items, a Trash Receptacle or a creature corpse is the best place for them. Leaving items on the ground for a long period of time causes lag, and is discouraged on Victorian Nordock. There are trash receptacles inside of most mines: please use them. For skinning animals, creature corpses make nice trash cans for dumping unwanted meat, and disappear quickly (in around 2 minutes, see Chapter 6.2 for more info).
Crates and forges are also provided in some crafting areas, and can be used to store items that don’t fit into one’s inventory, as well as for transferring items to another character. Trash receptacles can also be used as containers to transfer items; just be careful not to empty the trash receptacle with important items inside (i.e. ‘don’t tell the bin to empty itself if useful items are being stored in it!).
4.4 Item Storage: Magic Bags, Mining Bags, and Mules
As already mentioned in Chapter 2.5, it is a good idea to offload any items that are not immediately needed on a crafter, to mule characters. To expand the storage capacity of mules ‘and’ crafters however, it is best to use bags. Loooots of bags!
Magic Bags can be crafted in Tailoring (see Chapter 5), Tanning (see Chapter 6), and bought in finite amounts from certain merchants. Most bags reduce the weight of their contents inside, from 20%-80% (Magic Bags) all the way up to 100% (Bags of Holding). The greater the reduced container content weight % of the bag, the lighter the items placed in the bag will become. Typically, major towns for each faction will have at least 1 merchant that sells magic bags of the 20%/40%/60%/80% varieties (1 of each, or 4 bags total), and certain ‘special merchants’ will sell 1 Bag of Holding (see below). Merchant inventories restock on server resets, which occur every 24 hours (see Chapter 13.2 for more info).
Bags of Holding are of particular use to crafters for storage, as they can be renamed using a Shadow Iron Tailor’s Blade (bought from a Tailoring merchant). Use the special power from a blade on a Bag of Holding, and it will automatically be renamed to ‘whatever item was last placed in the bag’. E.g. if a Potion of Heal was placed in a Bag of Holding last, then the bag will be renamed to ‘Bag of Potion of Heal’. Some merchants that sell once/reset Bags of Holding include: Garl Glittergold (Gnome Village Magic Shop), Vrillow Hawk Master (Desolate Wastelands Oasis), Waitress (Sons of Thunder Guild Hall Entrance), Mes El’tanet (Underdark Gloomy Dark SE of Makanor), and Lorea Ktos (Tower of Ktos Nine Hells Shop).
In addition to magic bags, there are also craftable Mining Bags. Mining Bags reduce the weight of their contents by 0-40% (depending on the type, see Chapters 5 & 6), and are scripted to AUTOMATICALLY DEPOSIT ORE AND GEMS INSIDE THEM, removing the need to move ore and gems into bags manually. This allows crafters the ability to click on a mineral deposit, and then leave the game alone for 5 minutes to auto-mine until the deposit is exhausted, by which time its contents have been mined & neatly bagged.
There are however a couple of catches with mining bags. Firstly, the Forge can be ‘overloaded’ if more than 255 items (i.e. the 8 bit limit) are placed inside, thereafter smelting only 1 item at a time (as opposed to ‘everything inside at once’). 36 Bags of Ore = 36×7 or 252 items, which is pretty close to the maximum amount of items that the forge can handle. Thus, there’s basically no point having more than 36 Mining Bags on an individual miner or crafter. It is also a good idea to NOT STORE ITEMS LONG TERM IN MINING BAGS, as these can clog up a forge unexpectedly. ‘Temporarily’ storing items in mining bags is generally useful however, such as storing animal hides when out in the field skinning things. Just keep in mind that it is good practice to check & empty mining bags of their contents before moving onto the next project.
Secondly: Once an inventory has exceeded a certain number of items (probably 255 again, which is very easy to do as a crafter), Mining Bags can begin to ‘malfunction’ and not load items properly, despite having extra capacity inside. The easiest way to fix this problem is to load all mining bags into a forge, and then click ‘smelt ore’, which will automatically place the bags back into the crafter’s inventory once all ore has been smelted (i.e. ‘straight away’ if there is no ore inside!), and should ensure that the bags ‘function properly’ after that, as long as the crafter remains logged on (they will have to repeat this process if they log off).
A good question to ask then is: How many bags should a character carry, where should they be carried (‘what inventory pages’ from 1-6), and what types? Here are some recommendations:
For Crafters: it is worth having the first page of inventory relatively free (essential non drop items + ‘space’), then up to 30-36 mining bags (on pages 2-4), then 12-18 magic bags or Bags of Hold at the back of inventory for storage (pages 5-6). Page 6 should contain 12 storage bags, and it is a good idea to have 6 storage bags on the left side (occupying 4×6 squares), followed by 2×6 squares of space in the middle, and another 6 bags on the right side (occupying the remaining 4×6 squares). This allows crafters to switch materials in and out of several storage bags at once, using the space in the middle of the page.
For Flower Pickers: Keep 3 storage bags on the back inventory page for storage of food/other items, but otherwise, flower pickers should aim to keep their inventory as vacant as possible. Flowers can be picked straight into blank inventory pages, and then once these inventory pages are filled with 1 or more flower types (perhaps in ‘multiples of 35’ to correspond to storage-container inventory page sizes), they should then be immediately transported to a container or trash can for a crafter to use. Putting flowers into and out of storage bags is a lot of unnecessary work, so it’s best not to bother with ‘flower bagging’ at all!
For Secondary Miners: 36 Mining Bags + a few magic bags for storage is all that’s required, and it doesn’t really matter where they go. Secondary Miner characters should keep as uncluttered an inventory as they can manage, and only store what they’re currently working with (i.e. ore to be smelted & passed on to a crafter).
For Mules: Essentially ‘the first page of a master crafter inventory’ and then ‘the back page x5’. Have the first page of a mule character’s inventory be relatively item free save for non drop/essential items, and then have 12 bags of the 60-80% weight reduction variety on the remaining 5 pages (60 total), in a ‘6 bags on the left + 2×6 squares free in the middle + 6 bags on the right’ arrangement. Again: having a bit of free space close to each set of storage bags makes item sorting a lot easier. If 60 bags isn’t enough storage, then just make another mule character!
Finally, in the event that bags are unavailable, there are some ‘alternative’ (fiddly) real-time storage options available. Henchmen (from Captain Tucker/Elrowade/Hafur Hakeln depending on faction) can be used as mobile containers for low level characters (up to level 8), as they have usable inventories. Pack Oxen, summoned from Ox Whistles (bought either from the Desolate Wastelands Oasis, or the Sons of Thunder Guild Hall Entrance), also function as mobile containers, but they can be tricky to use. To load an Ox, tell the Ox to ‘drop their pack’, and place items into the pack. To get the Ox to move, tell it to ‘strap on pack’. WAIT UNTIL THE PACK ON THE GROUND AND ANY DROPPED ITEMS TOTALLY DISAPPEAR, else the Ox will start randomly dropping things on the ground.
Personally, I don’t endorse either of these storage methods as:
- They both cost money,
- Henchman are only available up to level 8, and
- Oxen, besides dropping things, have a habit of getting stuck on a particular map and not moving for up to 20 minutes.
Much easier to use bags!
4.5 Passive vs Active Inventory Management
Crafting involves a lot of time and inventory management, and there are a lot of times in crafting where the character can be effectively left to do their own thing, or is required to ‘make the same thing over and over again’ until their ingredients are all used up. It is possible then to divide ‘crafting jobs’ into ones that can be done passively i.e. automatically without any inputs, or actively requiring movement of the character and/or items within inventory in real time.
Which brings us to (4th wall break incoming): Autoclickers (it’s 2025, let’s not pretend these aren’t useful!). There are tons of Autoclickers available for free with a little searching online. I use a Bronze-Age 2012 Macbook to run NWN:EE, and I find the ‘Murgaa.com’ autoclicker to be useful (as it’s one of a handful that still runs on my archaic OS!). Autoclickers can be set to click at set time intervals for a certain number of clicks, which is perfect for tasks such as ‘crafting the same type of item 30 times in a row’.
After obtaining an autoclicker, it is worth recognising ‘when’ a craft can be passively managed. The main obstacle to passive management (aside from ‘game mechanics’) is inventory overflow. Some crafting tasks require a lot of component items, and/or produce items that take up a lot of space, which makes passive management difficult or detrimental.
With all this in mind, here are some crafting tasks that should be performed actively or passively.
Passively managed tasks include:
- Mining Ore with an inventory full of empty mining bags. Click an ore, then wait 5 minutes for the deposit to be mined & the ore to be automatically placed into bags. Easy!
- Smelting Ore using mining bags. Put bags in forge, hit smelt, then wait for everything to be smelted & the bags placed back into the crafter’s inventory.
- Gathering flowers. Click a bush to ‘mine’ flowers from it, fill up the inventory with as many flowers as is needed, then move onto the next bush or back to a container.
- Crafting multiple of the same type of small Tailoring item (i.e. ‘not cloths, cloak, armour or robes’). Tailoring items tend to be small (meaning they don’t typically overflow an inventory), and dyes stack in groups of 10. Recommended autoclicker setting = 5 seconds.
- Cutting gems. Gems take up very little space & stack in groups of 10, and so are very unlikely to overflow an inventory. Recommended autoclicker setting = 4 seconds.
- Crafting multiple of the same type of ring. Rings only take up 1 square and should fit easily into vacant inventory space. Recommended autoclicker setting = 5 seconds.
- Crafting multiple of the same type of small weapon. Weapons that take up 1-3 squares (E.g. Daggers, Shortswords, Rapiers) should fit easily into vacant inventory space. Recommended autoclicker setting = 7 seconds.
- Crafting multiple of the same type of small shield or helmet. These take up 4 squares and should fit into vacant inventory space. Recommended autoclicker setting = 7 seconds.
- Crafting multiple of the same type of tinkering item. These are typically small (1-2 squares), and also often may be green items that need to be crafted repeatedly as components for other items. Recommended autoclicker setting = 5 seconds.
- Crafting multiple of the same type of arrow. These are typically crafted in batches of 20 & take up only 2 squares per 99 arrows. Recommended autoclicker setting = 5 seconds.
Actively managed tasks include:
- Skinning Animals. Once an animal corpse has been clicked for skinning, the crafter is then free to perform other actions (despite the animation), and a few seconds later the hides and meat will appear in their inventory. Crafters should use these few seconds of ‘skinning time’ to run to/attack the next animal they wish to skin, and more importantly, STORE HIDES IN BAGS (which could be mining bags!). Excess meat can either be placed on a creature corpse and disposed of (e.g. an Orc/Goblin nearby to animals), or cooked on a campfire (using an Oil Flask on the ground).
- Curing/Tanning/Hardening Hides. These all require lots of auxiliary ingredients to make (wood, oil, acid, etc), which all take up a lot of space, and thus it is a good idea to actively move newly prepared hides into bags as they are being produced.
- Crafting multiple of the same type of Sewing Kit item. These items have no time lag between attempts, and can be effectively crafted at the speed that one mashes the ‘craft’ button. However! They do take a few seconds to make, and in the event that a conversation is ‘ended’ before Sewing Kit items are made (which can be done using the exact same button used to craft said items…), then THE INGREDIENTS WILL BE USED UP WHILST THE ITEMS DISAPPEAR. Thus, it is worth actively controlling the rate at which Sewing Kit items are crafted, and ensuring ‘not’ to close the conversation before all queued items appear in inventory.
- Crafting multiple of the same type of large item from any craft (i.e. 4+ squares). Similar to preparing hides, these should be actively placed into empty bags as they’re being produced, to avoid excess items falling onto the ground. If these items are to be sold later at Mulrok Trade Hall (see Chapter 4.8), then they can safely be put into mining bags & emptied out later while selling things.
- Putting excess small crafted items into bags. Crafting 1 batch of small items (e.g. a bunch of rings) might not overflow an inventory, but producing ‘multiple’ batches in a row could easily do this, so it’s worth taking stock every so often & putting small crafted items into bags. If these items are to be sold later at Mulrok Trade Hall (see Chapter 4.8), then they can safely be put into mining bags & emptied out later while selling things.
4.6 Fast Transport Options & Wings Amulet Overview
Crafters are often required to cover large amounts of ground in search of ingredients, particularly when collecting animal hides or parts. It is useful then to know what transport options are available to speed things up.
The most basic fast transport option are boats, which can be used to travel between major crafting centres. Boat tickets cost money, and so as mentioned in Chapter 4.1, it’s a good idea to have a little bit of coin in reserve before beginning any craft.
There are three ‘instant’ fast transport-related options available to crafters, though they take some effort to acquire. The first is the Mappers Scroll from the Map Room, which can be accessed via the Ancient Ruins in Mulrok. Once inside the map room, a scroll can be purchased from the cartographer for 50,000gp, which can be used a single time to return to the map room, from just about anywhere in Victorian Nordock. The map room meanwhile contains several ‘markers’, which can be used to teleport to various locations around Victorian Nordock. Thus, the Mappers Scroll is a costly, but nonetheless very useful, method of both quickly travelling to a particular location to collect an ingredient (see Chapter 3.6), or returning back to town to craft various items. This is more easily done for Surfacers than for Drow/Duergar, though Underdark races can use the boat in Mulrok to return to their home towns, and also make use of Surfacer crafting equipment provided that they either run invisible past hostile NPC’s first, or get themselves the Wings Amulet (see below).
The second fast transport item is the Personal Locator Beacon. This allows crafters to set a ‘mark’ point, that they can then use a temple portal to return to at any time during a server reset, which is useful for returning to a point out in the field (such as an animal spawn) or a crafting workshop (such as Black Hills) when combined with the Wings Amulet (see below). This item is crafted in Tinkering (see Chapter 12.2), and is also available from Tolmon the Shield Guardian salesman in Mulrok Gateway Tavern. To acquire the beacon from Tolmon however first requires building the base model of the Shield Guardian, in addition to paying 1,000,000 gp for the beacon. For those that would rather access to the beacon before levelling Tinkering up: The Shield Guardian requires a number of components, most of which are within a few maps of Benzor. This includes a Head (Zhengi Warriors from the Zhengi Highlands), Body (Swamp Dragons from Hissing Bog), Arms (Black Dragons from Eastern March Forest), Limited Wish Spells (Grissom from Trommel Woods), and Legs (from a selection of Level 6-10 Deity Quests or the bottom of Dread Castle in some locked chests).
The third fast transport item, and arguably the most useful item available to a crafter, is the Wings Amulet. The Wings Amulet allows for teleportation to various places around the module, and also allows for Drow and Duergar to be NEUTRAL WITH SURFACERS (allowing them to easily use their crafting setups!). Wings Quest parties are typically server-wide affairs, and can be completed using any character level 15 or above (and is also one of a handful of times where partying up with characters more than 5 levels above is beneficial!). The Wings Quest requires SEVERAL CRAFTED ITEMS in order to complete, requiring high skill in Mining, Blacksmithing, Gemcutting, Weapon Crafting, Armour Crafting, and Tanning. The crafting instructions on how and what are needed to make the Wings Quest items are scattered throughout this guide, and indicated by CAPITAL LETTERS. A run-down of the components required for the Quest, as well as the Quest itself, is provided in Chapter 14.
4.7 The Master Crafter’s Guild, Crafting Order Quests & Mithral Tools
Once a crafter has mastered at least 3 primary crafts, they are eligible to join the Master Crafter’s Guild in Mulrok. This will require a DM giving them a Master Crafter Ring, which functions both as an item with increased Craft Armour/Weapon skill (making it easier to modify the appearance of chest armour and weapons), as well as a key that grants access to all sections of the Master Crafter’s guild. Inside the guild hall are crafting merchants of all descriptions, a decent little mine containing just about all metals and gems (Tetra’s Mine, on loan from the Underdark), and a set of ‘Crafting Orders’ billboards.
The Crafting Orders quests offer a novel method for crafters to make money & small rewards, and crucially, offer a chance to obtain Mithral Crafting Tools. Once upon a time, these tools were offered on rare occasions by DM’s during events at the Benzor Fair, but with the advent of the Crafting Orders system, these can now be obtained in-game!
To use the Crafting Orders system: Click on either the Weapon Orders OR Armour Orders billboards. These billboards will then display a ‘crafting order’ (typically a recipe item or Exceptional item of some kind) for a given NPC (typically hanging around major towns, such as Benzor). In the event that an item requires a recipe as a component (e.g. Longsword of Algoroth), then this recipe is gifted to the crafter along with the order.
Once an order is set, it will not change until the server is reset, or the order is delivered. Upon delivering the order, the delivery NPC will grant a gold reward as well as a ‘random’ reward of some kind. This random reward has a 1/12 chance of being a Mithral Smithing Hammer , and a 1/12 chance of being a Mithral Mining Pickaxe. Both tools very rarely break, effectively lasting months or even years, which is extremely handy for a weapon/armour crafter!
Given that the ‘order’ quests are random & encompass a lot of recipe items, the best way to tackle these sorts of quests for a crafter, is to hoard a number of miscellaneous ingredients (Chapter 3.6 for the full list), and have these items on standby ready to make crafting orders. A patient crafter can potentially net themselves a ‘Mithral Tool Set’ from this endeavour, and potentially never have to craft a Smithing Hammer or Pickaxe ever again!
4.8 The Mulrok Trade Hall
Crafted items are labelled as stolen items, and cannot be sold at regular merchants. Instead, there is a tradehall in the neutral city of Mulrok at which crafted items can be bought and sold. Mulrok can be reached by boat from either Benzor or the Underdark. The trade hall is located in the middle of the city, and has a north and south entrance. Inside the tradehall are a number of merchants who buy and sell particular types of crafted items. There are also chests beside these merchants with sample items inside them, though these might not be 100% reliable (as they don’t automatically update in the event that crafting items themselves are updated, and so sometimes things are missed!).
Unlike regular merchants, Mulrok Trade Hall merchants feature a chat menu that includes all the items available to buy and/or sell. Not all items are always available for sale from the tradehall (some are redded out, indicating lack of stock), but just about all crafted items (excluding ammunition, see Chapter 12) can be sold to a merchant within the Trade Hall. This makes the Trade Hall a great place to sell ‘leftover items’ created while leveling up crafts, such as leftover ‘difficult to make’ weapons made from increasing weapon crafting (e.g. Greatswords), leftover rings from increasing Jewelrycrafting, leftover hides and dyes from increasing Tailoring and Tanning, leftover Bows, etc.
The Trade Hall also sells Haste and Knockdown Immunity items, in the event that a crafter is not able to make them yet and would like to use them. These include:
- White Priest’s Robe (Knockdown Immunity) for 100,000gp,
- Yellow Wizard’s Robe (Haste) for 100,000 gp,
- Exceptional Rubicite Chainmail Coif (Haste) for 253,800 gp,
- Exceptional Mithral Chainmail Coif (KD Immunity) for 453,600 gp.
The main use for the Trade Hall for a crafter however, is to make money from selling crafted items. Mass production of ‘sellable items’ at the Trade Hall is a great way of making money. Items that don’t require many types of ingredients that are easy to collect/refine, are the best to mass produce and sell.
Here is a list of some of the more profitable items to mass produce for the Trade Hall. Sadly there is no merchant that will purchase arrows, and Bows do not sell for very much, meaning that Bowyers and Fletchers will have to look to the other crafts to make decent money from selling items.
- Any dye (Tailoring, besides Black): 700gp.
- Any cured/tanned/hardened hide (Tanning): 1,200 gp.
- Any dyed cloth (Tailoring): 1,900 gp.
- Any Lesser/Normal Clothes/Belts/Bags/Gloves 2,100 gp (Tailoring),
- Leather Armours/Cloaks/Boots 4,000 gp (Tailoring).
- Boots – Lesser – Yellow, 8,000 gp (Tailoring). Quite easy to make (1 yellow dye + 2 Hardened Small (Badger) Leathers), good for mass production for Tailors alongside Dyes.
- Crafted Verdicite Weapons. Verdicite Daggers are 2,080gp for normal, and 18,720gp for exceptional. They require 2 ingots, and are light blue on maximum level. Verdicite Greatswords are harder to make (red on maximum skill level), and require 8 ingots, but are the most expensive weapon to sell at 14,240 gp normal, 128,160 gp exceptional.
- Normal/Exceptional Syenite Smooth Turquoise Ring (Jewelcrafting): 12,675 gp normal Turquiose, 24,315 gp ideal Turquiose.
- Crafted Strong (Deadly) Acid/Cold/Electrical/Fire Traps (Tinkering): 12,852 gp. There are various gnomish items that sell for more than this, though they require quite a lot more ingredients.
- Far and away, the best items to mass produce for money are Verdicite/Rubicite/Syenite Half Plates (Armourcrafting), which only require ingots to make (no ideal gems or hides necessary!). Several mines contain clumps of Shadow/Rubicite/Syenite/Verdicite deposits, and given that Shadow is worth less than the other 3, it might be worth getting a rock destroyer in (see Chapter 2.5) to remove Shadow deposits to support Half Plate production. The half plate made from the most expensive of these metals, Syenite, sells for 59,360 gp normal, and 534,240 gp exceptional.
4.9 The Primary and Secondary Crafts, Recipe Consumption & Future Formatting
So far the guide has covered primarily ‘mechanical’ aspects of crafting, such as techniques and locations for items. The rest of the guide will now focus on each of the individual crafting skills themselves. As has already been mentioned, the recommended crafting skill order for a crafter to progress through is:
- Tailoring (accompanied by a little Tanning & with the help of a flower picker),
- Weaponcrafting (accompanied by Mining & Smithing),
- Armourcrafting (accompanied by a little Tanning),
- Jewellerycrafting (accompanied by Gemcutting),
- Tanning (up to around 170/200 to make all the required Wings items),
- Tinkering (required to make high end bow strings),
- The rest of Tanning + Bowyering/Fletching in any order.
And so the chapters ahead will be written with this in mind.
Each chapter will contain skill-specific techniques and levelling strategies for each skill, as well as recipes for the available crafted items within each skill. As most Secondary skills are effectively inseparable from their counterpart primary skills (mining/smithing with weapon crafting, gemcutting with jewelry), they are lumped in with these skills, as opposed to having whole chapters devoted toward them. The exception to this is Tanning, which effectively contains a ‘primary skill component’ in the form of the standalone Sewing Kit items, and so Tanning deserves its own chapter.
Information regarding item properties, item ingredient properties and special recipe items can be found within each chapter. Powerful items (which mightn’t necessarily be recipe items but deserve a mention) are underlined.
Any recipe items which themselves consume the recipe in production (and thus require a recipe to make) have ‘1 Recipe’ marked in their ingredient list. The items that consume a recipe as an ingredient are listed below.
Tailoring: Arcane Robes, Shadow Cloak, Armour of Algoroth.
Weaponcrafting: Longsword of Algoroth, Capricious Blade, The Haze, The Growl, The Harvester, Curved Death, Demonic Fury, The Screaming Cleaver.
Armourcrafting: Gold Dragon Armour, Armour of the Black Knight, Armour of the White Knight, Rainbow Rainment, Shield of Algoroth.
Jewelrycrafting: Greater Mortikes Ring, Fire Ring, Amulet of Senses, Amulet of Chronos, Amulet of Necromancer.
Finally, at the end of the guide are some sections pertaining to ‘crafting related’ systems and quests, namely the Deity Quest System & the Wings Amulet.
But first, onto the skills!
Chapter 5: Tailoring
5.1 Tailoring Introduction, Item Management & Skill Levelling Tips
Tailoring is the craft concerned with converting hides and dyes into usable clothing and bags. This makes it both an easily accessible and universally beneficial craft for crafters and adventurers of all descriptions, with key items including Haste Robes, KD Immunity Robes/Belts, Spell Resistance Cloaks, Monk Gloves, and Mining Bags to support other crafts. Hence why Tailoring is first on the list!
To begin Tailoring will require 2 different characters: A flower picker character to collect flowers (see Chapter 2.5), as well as ‘the crafter’ to convert said flowers into dyes. Tailoring also requires hides from Tanning skill, which are covered in more detail in Chapter 6.
As a recap from Chapter 3, dyes are made from the following flowers:
- Iris (Aqua)
- Orcish/Bugbearish/Fisherman’s Brewer (Black), produces the dye itself rather than the flower.
- Ageratum (Blue)
- Sunflower (Brown)
- Snapdragon (Bronze)
- Marigold (Gold)
- Summer Savoury (Gray)
- Spearmint (Green)
- Tarragon (Lime)
- Nasturtium (Maroon)
- Cornflower (Navy)
- Chives (Olive)
- Petunia (Purple)
- Geranium (Red)
- Dusty Miller (Silver)
- Forget-Me-Not (Teal)
- Alyssum (White)
- Everlasting (Yellow)
Next, skill progression. Most of the levelling curve for Tailoring can be progressed through via crushing flowers into dyes. This will require a flower picker to transport lots of flowers to a container/trash can for a crafter to then use. To start, converting Iris flowers into Aqua dyes will level Tailoring from 0-20, then 20-35 will require using Aqua & Black Dyes (harvested from brewers) to make Cloths. The easiest way to do this is to make Hardened Small and Medium Leather hides from Badgers/Deers (which will require starting Tanning, see Chapter 6) using the crafter character (not the flower picker!), and then make Aqua and/or Black cloths out of them, which can then be converted into Boots and Belts.
After hitting 36 Tailoring, 36-330 can be progressed through simply by crushing various flowers into dyes, with the final dye being Yellow (Everlasting). It is worth mass producing Yellow dye and keeping it in storage, as this can then be used to create Yellow Boots (up to 360 skill), alongside Yellow Normal/Greater/Ultimate Belts + Gloves up to 400 skill. Yellow clothing can then be sold to the Mulrok Trade Hall (see Chapter 4.8) to purchase other items later, such as Epic gear from the Epic Shop, or Strength/Intelligence boosting items from the Desolate Wastelands Oasis shop.
The Intelligence score of a crafter will determine how many flowers are typically required to level up Tailoring to the point where ‘a new flower dye’ is unlocked. Typically, 70-105 of a particular flower (i.e. enough to fill 2-3 pages of a trash can or container) ‘should’ be enough to level up to the next ‘dye rank’. And so, a Flower picker should try to pick flowers in these amounts, which usually results in around 3-4 flower types being picked by a flower picker before their inventory is full, thereafter requiring transfer of flowers via a container to a crafter.
For hides/tanning item management, more info is covered in Chapter 6 in the Tanning section (worth a read before progressing with Tailoring!).
5.2 Tailoring Item Recipes
Almost all tailored items are crafted from animal hides, apart from dye. While it is possible to level most of the way through tailoring by making dyes alone, a medium to high tanning skill (50-100) is required to consistently craft small/medium/large hardened hides, which are combined with dye to make cloth (for more info on curing/tanning/hardening hides, see Chapter 6.3). All Belts, Cloaks, Gloves, Clothing/Robes, Light Armour, Bags and Boots, with a few exceptions (see below), are all made from dyed cloth. Dyes and cloth are crafted under the ‘Miscellaneous’ section of the Tailoring Table, which will require a Tailoring tool equipped to use.
The properties of most tailored items are not linked to the dye or cloth type (several items made by the same dye have different bonuses), and so the properties of each individual tailored item have been provided below.
The general ingredients for each item are:
- 1 Dye: 1 Flower (see 5.1 to check which flowers & dyes correspond to each other)
- 1 Small Dyed Cloth: 1 Hardened Small Leather Hide, 1 Dye.
- 1 Medium Dyed Cloth: 1 Hardened Medium Leather Hide, 1 Dye.
- 1 Large Dyed Cloth: 1 Hardened Large Leather Hide, 1 Dye.
- 1 Cloth Padding: 2 Hardened Medium Leather Hides. Cloth Padding can also be purchased from the BLACKSMITHING merchant.
- Belts: 1 Medium Dyed Cloth.
- Cloaks: 2 Large Dyed Cloths.
- Gloves: 2 Small Dyed Cloths.
- Clothes: 1 Large Dyed Cloth.
- Armours: 2 Large Dyed Cloths.
- Bags: 1 Medium Dyed Cloth.
- Mining Bags: 1 Large Dyed Cloth.
- Boots: 2 Small Dyed Cloths.
Belts (Lesser):
- Cloth. NOT CRAFTABLE (doesn’t exist).
- Aqua. Special Properties: Light 15m (White).
- Black. Special Properties: Light 15m (White), Discipline +4.
- Blue. Special Properties: Light 15m (White), Perform +4.
- Brown. Special Properties: Constitution +1.
- Bronze. Special Properties: Spell Resistance 12.
- Gold. Special Properties: Intelligence +1.
- Gray. Special Properties: Charisma +1.
- Green. Special Properties: Deflection AC Bonus +2.
- Lime. Special Properties: Bonus Feat Alertness.
- Maroon. Special Properties: Bonus Feat Weapon Specialisation (unarmed strike).
- Navy. Special Properties: Use Aid (3) 1 Use/Day, Use Barkskin (12) 1 Use/Day. A nifty buffing low-level belt.
- Olive. Special Properties: Deflection AC Bonus +3.
- Purple. Special Properties: AC Bonus vs. Dragons +2 Deflection, 10 / – Piercing Resistance, 10% Bludgeoning Vulnerability.
- Red. Special Properties: Saves vs. Cold +5, Saves vs. Electrical +5.
- Silver. Special Properties: Bonus Feat Point Black Shot, Hide +10, Move Silently +10.
- Teal. Special Properties: Deflection AC Bonus +5.
- White. Special Properties: Strength +3, Deflection AC Bonus +2.
- Yellow. Special Properties: Intelligence +2.
Belts (Normal):
- Aqua. Special Properties: Deflection AC Bonus +1.
- Yellow. Special Properties: Deflection AC Bonus +2, Intelligence +2, Strength +2, Discipline +5.
Belts (Greater):
- Aqua. Special Properties: Deflection AC Bonus +1, Constitution +1.
- White. Special Properties: Constitution +3, Deflection AC Bonus +3.
- Yellow. Special Properties: Deflection AC Bonus +3, Strength +4, Discipline +10. The highest Strength belt possible to make.
Belts (Ultimate):
- Aqua. Special Properties: Deflection AC Bonus +2, Strength +2, Discipline +5.
- Yellow. Special Properties: Deflection AC Bonus +3, Strength +3, Immunity: Knockdown. A very desirable item to make for an early crafter; just remember that other immunity items (e.g. Fear immunity) often occupy the belt slot!
Cloaks (Lesser):
- Aqua. Special Properties: Deflection AC Bonus +1.
- Black. Special Properties: Deflection AC Bonus +2.
- Blue. Special Properties: Deflection AC Bonus +3.
- Brown. Special Properties: Universal Saves +2.
- Bronze. Special Properties: Universal Saves +1.
- Gold. Special Properties: Universal Saves +3.
Cloaks (Normal):
- Aqua. Special Properties: Deflection AC Bonus +1, Spell Resistance 10.
Cloaks (Greater):
- Aqua. Special Properties: Deflection AC Bonus +1, Spell Resistance 14.
- Yellow. Special Properties: Deflection AC Bonus +3, Spell Resistance 26.
Cloaks (Ultimate):
- Aqua. Special Properties: Deflection AC Bonus +2, Spell Resistance 18.
- Yellow. Special Properties: Deflection AC Bonus +4, Spell Resistance 32. This cloak should provide ample spell protection vs low & medium level casters, but is not reliable spell protection at higher levels.
Gloves (Lesser):
- Aqua. Special Properties: Attack Bonus +1.
- Black. Special Properties: Attack Bonus +1, Bludgeoning 1 Damage.
- Blue. Special Properties: Attack Bonus +1, Bludgeoning 2 Damage.
Gloves (Normal):
- Aqua. Special Properties: Attack Bonus +1, On Hit Stun DC14 75% / 1 Round.
- Yellow. Special Properties: Attack Bonus +3, Bludgeoning Damage +3, On Hit Stun DC16 75% / 1 Round.
Gloves (Greater):
- Aqua. Special Properties: Attack Bonus +2, On Hit Stun DC14 75% / 1 Round.
- Yellow. Special Properties: Attack Bonus +3, Bludgeoning Damage +4, On Hit Stun DC18 75% / 1 Round.
Gloves (Ultimate):
- Aqua. Special Properties: Attack Bonus +3, On Hit Stun DC16 75% / 1 Round.
- Yellow. Special Properties: Attack Bonus +4, Bludgeoning Damage +5, On Hit Stun DC18 75% / 1 Round. These gloves are on par with Epic Monk Gloves, and can also have Power Gems added to them to increase their damage (see Chapter 13).
Clothes:
- Aqua, Citizen’s Outfit. Special Properties: AC +1.
- Black, Assassin’s Garb. Special Properties: AC +1, Hide +5.
- Blue, Commoner’s Tunic. Special Properties: AC +1, Listen +5.
- Brown, Adventurer’s Robe. Special Properties: AC +1, Damage Reduction 5/+1.
- Bronze, Adept’s Tunic. Special Properties: AC +1, Discipline +5.
- Gold, Sorcerer’s Robe. Special Properties: AC +1, Spellcraft +5.
- Gray, Gladiator’s Outfit. Special Properties: AC +2, Taunt +5.
- Green, Woodsman’s Outfit. Special Properties: AC +2, Animal Empathy +5.
- Lime, Performer’s Outfit. Special Properties: AC +2, Perform +5.
- Maroon, Barbarian’s Outfit. Special Properties: AC +2, Intimidate +5.
- Navy, Master Adventurer’s Robe. Special Properties: AC +2, Damage Reduction 10/+3.
- Olive, Commoner’s Outfit. Special Properties: AC +2, Listen +5, Spot +5.
- Purple, Conjurer’s Robe. Special Properties: AC +3, Use Summon Creature III 1/day.
- Red., Demony’s Outfit. Special Properties: AC +3, 15/- Fire Resistance.
- Silver, Illusionist’s Robe. Special Properties: AC +3, Spell Resistance 20.
- Teal, Jester’s Outfit. Special Properties: AC +3, Charisma +2.
- White, Priest’s Robe. Special Properties: AC Bonus +2, Immunity to Knockdown.
- Yellow, Wizard’s Robe. Special Properties: AC Bonus +2, Haste.
- Arcane Robes. Base Item: Robe. Special Properties: AC Bonus +3, Spell Focus (Necromancy), Spell Focus (Enchantment), Spell Focus (Evocation), Universal Saves +1. Ingredients: 2 Large Black Cloth, 1 Mantle of Abjuration, 2 Lich Skulls, 1 Fairy Dust, 1 Ideal Diamond, 1 Recipe.
- Shadow Cloak. Base Item: Robe. Special Properties: AC Bonus +4, Darkvision, Hide +5, Move Silently +5, Tumble +5, Weight Reduction 80%. Ingredients: 2 Large Black Cloths, 1 Plague Demon Horns, 2 Fairy Dust, 1 Blue Dragon Breath Gland, 1 Recipe.
Armours:
- Aqua Padded/Leather Armour. Special Properties: AC Bonus +1.
- Black Padded/Leather Armour. Special Properties: AC Bonus +1, Light 5m (Orange).
- Blue Padded/Leather Armour. Special Properties: AC Bonus +2.
- Brown Padded/Leather Armour. Special Properties: AC Bonus +1, Strength +1.
- Bronze Padded/Leather Armour. Special Properties: AC Bonus +1, Light 5m (Orange), On Hit Daze Level 1.
- Gold Padded/Leather Armour. Special Properties: AC Bonus +1, Bonus Feat Point Blank Shot.
- Gray Padded/Leather Armour. Special Properties: AC Bonus +2, Dexterity +2.
- Green Padded/Leather Armour. Special Properties: Bonus Feat Improved Critical (unarmed strike), Bonus Feat Power Attack.
- Lime Padded/Leather Armour. Special Properties: AC Bonus vs. Evil +5, AC Bonus vs. Neutral +5.
- Maroon Padded/Leather Armour. Special Properties: AC Bonus vs. Good +5, AC Bonus vs. Lawful +5.
- Navy Padded/Leather Armour. Special Properties: AC Bonus +3, Bonus Feat Dodge.
- Olive Padded/Leather Armour. Special Properties: Set Trap +10, Spell Resistance 16.
- Purple Padded/Leather Armour. Special Properties: AC Bonus vs. Elf +5, AC Bonus vs. Half-Elf +5.
- Red Padded/Leather Armour. Special Properties: Damage Reduction +4 Soak 5.
- Silver Padded/Leather Armour. Special Properties: 5 / – Bludgeoning Resistance, 5 / – Slashing Resistance, 5 / – Piercing Resistance, Spell Immunity Magic Missile.
- Teal Padded/Leather Armour. Special Properties: 30 / – Electrical Resistance, 10 / – Slashing Resistance, Cold Vulnerability 25%, Light 15m (Green).
- White Padded/Leather Armour. Special Properties: Spell School Immunity: Necromancy, Use Haste (5) 3 Uses / Day. Good for Low AC/Tanky characters or dragon shifters.
- Yellow Padded/Leather Armour. Special Properties: AC Bonus +3, Spell Resistance 18.
- Aqua Studded Leather Armour. Plain Studded Leather Armour.
- Aqua Hide Leather Armour. Plain Hide Armour.
- Aqua Monk Outfit. Special Properties: AC Bonus +1, Only Usable by Monk.
- Black Monk Outfit. Special Properties: Bonus Feat Power Attack, Only Usable by Monk.
- Blue Monk Outfit. Special Properties: Weapon Specialisation Unarmed Strike, Only Usable by Monk.
- Brown Monk Outfit. Special Properties: Use Barkskin (3) 1 Use / Day, Only Usable by Monk.
- Aqua Mage Robes. Special Properties: AC Bonus +1, Only Usable by Sorcerer or Wizard.
- Armour of Algoroth. Base Item: Leather Armour. Special Properties: AC Bonus +4, Slashing Immunity 10%, Immunity to Fear, Light 15m (Yellow). Ingredients: 2 Large Silver Cloths, 1 Large Black Cloth, 5 Gold Ingots, 1 Ancient Red Dragon Heart, 2 Perfect Fire Opals, Lots of Dragon Blood, 1 Recipe.
Bags:
- Aqua. Special Properties: Reduced Content Weight 20%.
- Black. Special Properties: Reduced Content Weight 20%.
- Blue. Special Properties: Reduced Content Weight 20%.
- Brown. Special Properties: Reduced Content Weight 80%. Brown Normal Bags are the 2nd best storage bags in the game, behind Bags of Holding.
- Aqua Mining Bag. Special Properties: Reduced Weight 80%. SPECIAL MINING BAG (see Chapter 4.4). Note that only the bag’s weight is reduced, and not its contents.
- Black Mining Bag. Special Properties: Reduced Weight 60%. SPECIAL MINING BAG (see Chapter 4.4). Note that only the bag’s weight is reduced, and not its contents.
Boots:
- Aqua. Special Properties: 5 / – Acid Resistance.
- Yellow. Special Properties: 5 / – Acid Resistance, Wisdom +1, Spell Resistance 10. Good for mass production (see Chapter 4.8).
Chapter 6: Tanning
6.1 Tanning Introduction & Skill Levelling Tips
Tanning is the craft concerned with converting animal leathers into usable hides & hide-derived products. It is classed as a secondary skill, but also functions somewhat as a primary skill due to the ‘finished’ items that can be produced using the Sewing Kit. Armour Crafting, Tinkering and especially Tailoring all rely on hides prepared via Tanning, and at the higher skill levels, Tanning can help crafters to produce various bags (such as Mining Bags with Content Weight Reduction), including the Blackened Treated Leather Pouch (the most difficult Tanning item and a key component for the Wings Quest, see Chapter 14).
Tanning is arguably the most ‘time-gated’ skill that a crafter will encounter, as it is dependent upon the number & respawn times of various animals. The most efficient way to level Tanning requires making items using ‘common’ animal hides. Generally speaking, badgers/deer/grizzly bears/black bats are common, whilst animals for the other hides (e.g. White Stag, Winter Wolf) are not common. Thankfully, just about the entirety of Tanning skill can be levelled either by making, or using, cured/tanned/hardened hides of the badger/deer/bear/bat varieties.
Tanning, like the other 3 secondary crafts, is naturally levelled whilst gathering & preparing materials for other crafts. Around 40% of Tanning skill (up to around 80/200 skill) can be gained purely from making cured/tanned/hardened small/medium/large leather hides from badgers/deer/bears, which can then be used in other primary crafts (such as Armour Crafting & Tailoring). The rest of Tanning skill should be levelled via items from the Sewing Kit (which primarily include Mining/Leather Bags and Soft/Hard Leather Boots, derived from Badger/Deer/Bear/Black Bat Leathers). The most difficult Tanning item, the Blackened Treated Leather Pouch, is a Wings quest item that can be made from around 165 tanning skill onwards (meaning that it isn’t ‘mandatory’ to have Tanning maxed to make all available items, though a higher skill of course means a greater chance of success). Tanning skill itself maxes out at 190, once Blackened Treated Leather Pouches are green.
6.2 Tanning Item Management
In the event that a crafter has no bags available (which will most likely be the case at the start of Tailoring & Tanning), then they should seek to skin only 1-2 animal types at a time (e.g. Badger + Deer), and only in small amounts, whilst using creature corpses to dump excess meat, before returning to a crafting station. Remember too that as mentioned in Chapter 4.5, actions can be taken whilst ‘skinning an animal’ (such as moving to the next animal/hitting something else/etc.), even if skinning said animal takes several seconds. 20-30 hides at a time is manageable assuming no bags + a clear inventory, and after collecting these, crafters should then try to convert said hides into cured/tanned/hardened versions, which will itself require ‘extra’ inventory space to house wood/salt/etc. They should then make use of said prepared hides ASAP to free up inventory space for the next lot of hide collection.
In the event that a crafter ‘does’ have some bags (e.g. 30 Mining Bags + some storage bags at the back of their inventory as per Chapter 4.4), then they can use said bags to store hides whilst out in the field and collect more hides on an individual run. Badgers and Deer respawn quickly (in around 5 minutes), whereas other animals tend to take longer (10 minutes).
It can be worth studying the animal respawn locations and timers available to particular factions, in the event that a crafter wishes to ‘farm’ an awful lot of them. For example, the ‘Benzor Badger Loop’ contains 24 badgers , with 5 min respawn timers, on several maps: north of Benzor (5 badgers), Benzor Flats (4 badgers) and 2 larger badger spawns in the Benzor Hunting Fields (7 badgers near the entrance, then 8 badgers in the Southwest corner around to the left). For Grizzly Bears and Deer meanwhile, there are several spawns South of Brosna across several maps, making it a great place to ‘farm’ bear/deer leathers once a crafter has the bags to store them, both for Surfacers ‘and’ for Drow (as Valley of Darkness is connected to South Brosna Hills).
One final animal tip: USE AREA EFFECT SPELLS ON CLUMPS OF BADGERS. Fireball, Word of Faith, Hammer of the Gods, IGMS, Call Lightning, Ice Storm, Cloudkill, Curse Song, whatever. The spell could come from an item, such as Fireball from Scorchen’s Soul (deity quest item from Scorchen), in the event that a crafter doesn’t have area spells available to them. Badgers only have 6 HP, but are EXPERTS at scattering in all directions at the first sign of danger, making them an absolute pain in the ass to collect pelts from if they are allowed to do this. So take ‘em out before they get the chance to!
6.3 Tanning Recipes
Leathers can be cured at the Smoker’s Oven, and then tanned and/or hardened at the Water Basin. Tanner’s Sewing Kits meanwhile can be used to craft similar items to those found in Tailoring, and must be ‘used’ to craft said items. All ‘auxiliary items’ required for Tanning (Oak Logs, Salt, Tanning Acid, Tanning Oil, Beeswax) can be purchased from a Tanning merchant, along with the Sewing Kit. Auxiliary items can be bought in batches (e.g. Oak Logs x5) and they will automatically split themselves into individual items when being used for crafting.
The types of Leathers include:
- Badger (Small)
- Deer (Medium)
- Cougar (Medium)
- Brown/Grizzly Bear (Large)
- Black Bat (Small Black)
- Panther (Medium Black)
- Black Bear (Large Black)
- White Stag (Small White)
- Winter Wolf (Medium White)
- Crag Cat (Medium White)
- Polar Bear (Large White)
Cured Hides:
- Cured Small Leather Hide: 1 Badger Pelt, 1 Salt, 1 Oak Log.
- Cured Medium Leather Hide: 1 Deer/Cougar Pelt, 2 Salt, 1 Oak Log.
- Cured Large Leather Hide: 1 Bear Pelt, 3 Salt, 2 Oak Log.
- Cured Small Black Leather Hide: 1 Black Bat Pelt, 2 Salt, 1 Oak Log.
- Cured Medium Black Leather Hide: 1 Panther Pelt, 3 Salt, 1 Oak Log.
- Cured Large Black Leather Hide:: 1 Black Bear Pelt, 3 Salt, 2 Oak Log.
- Cured Small White Leather Hide: 1 White Stag Pelt, 2 Salt, 2 Oak Log.
- Cured Medium White Leather Hide: 1 Winter Wolf/Crag Cat Pelt, 1 Salt Wolf/3 Salt Cat, 2 Oak Log.
- Cured Large White Leather Hide: 1 Polar Bear Pelt, 3 Salt, 3 Oak Log.
Tanned Hides:
- Tanned Small Leather Hide: 1 Cured Small Leather Hide, 1 Salt, 1 Tanning Acid.
- Tanned Medium Leather Hide: 1 Cured Medium Leather Hide, 2 Salt, 1 Tanning Acid.
- Tanned Large Leather Hide: 1 Cured Large Leather Hide, 2 Salt, 2 Tanning Acid.
- Tanned Small Black Leather Hide: 1 Cured Small Black Leather Hide, 1 Salt, 1 Tanning Acid.
- Tanned Medium Black Leather Hide: 1 Cured Medium Black Leather Hide, 1 Salt, 2 Tanning Acid.
- Tanned Large Black Leather Hide: 1 Cured Large Black Leather Hide, 2 Salt, 2 Tanning Acid.
- Tanned Small White Leather Hide: 1 Cured Small White Leather Hide, 2 Salt, 1 Tanning Acid.
- Tanned Medium White Leather Hide: 1 Cured Medium White Leather Hide, 3 Salt, 2 Tanning Acid.
- Tanned Large White Leather Hide: 1 Cured Large White Leather Hide, 3 Salt, 3 Tanning Acid.
Hardened Hides:
- Hardened Small Leather Hide: 1 Tanned Small Leather Hide, 1 Beeswax, 1 Tanning Oil.
- Hardened Medium Leather Hide: 1 Tanned Medium Leather Hide, 2 Beeswax, 1 Tanning Oil.
- Hardened Large Leather Hide: 1 Tanned Large Leather Hide, 3 Beeswax, 1 Tanning Oil.
- Hardened Small Black Leather Hide: 1 Tanned Small Black Leather Hide, 2 Beeswax, 1 Tanning Oil.
- Hardened Medium Black Leather Hide: 1 Tanned Medium Black Leather Hide, 3 Beeswax, 1 Tanning Oil.
- Hardened Large Black Leather Hide: 1 Tanned Large Black Leather Hide, 3 Beeswax, 2 Tanning Oil.
- Hardened Small White Leather Hide: 1 Tanned Small White Leather Hide, 2 Beeswax, 1 Tanning Oil.
- Hardened Medium White Leather Hide: 1 Tanned Medium White Leather Hide, 3 Beeswax, 1 Tanning Oil.
- Hardened Large White Leather Hide: 1 Tanned Large White Leather Hide, 3 Beeswax, 2 Tanning Oil.
Sewing Kit:
- Small Miner’s Bag. Ingredients: 2 Tanned Small Leather Hide, 1 Small Bag Pattern. SPECIAL MINING BAG (see Chapter 4.4).
- Medium Miner’s Bag. Special Properties: Reduced Container Content Weight 20%. Ingredients: 2 Tanned Medium Leather Hides, 1 Medium Bag Pattern. SPECIAL MINING BAG (see Chapter 4.4).
- Large Miner’s Bag. Special Properties: Reduced Container Content Weight 40%. Ingredients: 2 Tanned Large Leather Hides, 1 Large Bag Pattern. SPECIAL MINING BAG (see Chapter 4.4). The Large Miner’s Bag from Tanning is the highest quality mining bag available, reducing the contents of its ore inside by 40%.
- Small Leather Bag. Special Properties: Reduced Container Content Weight 20%. Ingredients: 2 Hardened Small Leather Hides, 1 Small Bag Pattern.
- Medium Leather Bag. Special Properties: Reduced Container Content Weight 40%. Ingredients: 2 Hardened Medium Leather Hides, 1 Medium Bag Pattern..
- Large Leather Bag. Special Properties: Reduced Container Content Weight 60%. Ingredients: 2 Hardened Large Leather Hides, 1 Large Bag Pattern.
- Soft Leather Boots. Special Properties: Dexterity +1. Ingredients: 1 Tanned Small Leather Hide, 1 Small Boot Pattern.
- Hard Leather Boots. Special Properties: Constitution +1. Ingredients: 2 Hardened Small Leather Hides, 1 Small Boot Pattern.
- Soft White Leather Boots. Special Properties: 30 / – Cold Resistance. Ingredients: 1 Tanned Small White Leather Hide, 1 Small Boot Pattern.
- Hard White Leather Boots. Special Properties: 30 / – Cold Resistance, Saving Throws vs. Cold +1. Ingredients: 1 Hardened Small White Leather Hide, 1 Small Boot Pattern.
- Soft Black Leather Boots. Special Properties: 30 / – Fire Resistance. Ingredients: 1 Tanned Small Black Leather Hide, 1 Small Boot Pattern.
- Hard Black Leather Boots. Special Properties: 30 / – Fire Resistance, Saving Throws vs. Fire +1. Ingredients: 1 Hardened Small Black Leather Hide, 1 Small Boot Pattern.
- Blackened Treated Leather Pouch. WINGS QUEST ITEM. Base Item: Plain Bag, looks like a Bag of Holding. Ingredients: 2 Tanned Small Black Leather Hides, 1 Black Dragon Liver, 1 Small Bag Pattern. Take this + 10 Blackberry Gems (see Chapters 3.6 & 14.2 for more info) to Percy to make the Oil of Vukas.
Chapter 7: Mining, Blacksmithing and Weaponcrafting
7.1 Mining/Smithing/Weaponcrafting Introductions, Item Management + Skill Levelling Tips
After completing Tailoring and having progressed some way through Tanning, a crafter should have access to several Mining Bags (see Chapters, 4.4, 5.2 and 6.3). This makes inventory management for activities related to Mining and Blacksmithing a LOT easier, which themselves are best used to support Weaponcrafting first up. Hence, all 3 of these skills have been lumped into one chapter.
Mining and Blacksmithing are both secondary crafts, and are crafts concerned with the collection & processing of ore into usable metals. They are easy skills to level in tandom with each other, as after mining some ore, it needs to be smelted to make use of it. Mining does not require any crafting stations at all (merely pickaxes + ore deposits), and Blacksmithing takes place exclusively at a Forge.
After mining & smelting ore into metal ingots, Weaponcrafting is the first craft that should be leveled up to make use of said ingots. Weaponcrafting is the craft concerned with (naturally) making weapons, which also includes high quality tools for all available crafts, as well as high end arrowheads for Fletching (see Chapter 12). Weapons are crafted at an Anvil, which requires a Smithing Hammer equipped in the main or off hand in order to use.
Mining and Blacksmithing are the most straightforward secondary skills to level, simply requiring the mining & smelting of ores (plus some mining bags for ore collection, which themselves can be placed into a forge for smelting), from Copper>Bronze>Iron>Silver>Gold>Shadow>’The Rest’. Both skills should remain in sync with each other whilst progressing through these ores, save for blacksmithing around the 160/200 mark, where Silver & Gold might need to be mined in extra quantities & smelted, in order to progress smithing to the point where Shadow can be smelted. Other than that, levelling Mining + Smithing is simply a matter of gathering the metals needed for Weaponcrafting & levelling these two skills along the way.
Weaponcrafting meanwhile is the most straightforward primary skill to level, as ‘metals’ (in the order mentioned above) are the only material required to progress. There are a large range of weapons available to make, and the best weapons for levelling purposes are those that use the least amount of metal (i.e. only a few ingots each). These include: Dagger (Blade), Kama (Exotic), Mace (Blunt), Shortsword (Blade), Rapier (Blade) and Scimitar (Blade). Crafted weapons can be placed back into the forge and salvaged as well, recycling materials that can then be used ‘again’ to make more weapons & further level up weaponcrafting. It’s also worth converting some metal into Pickaxes and Smithing Hammers along the way.
The most difficult weapon type to make for any metal is the Greatsword, which also happens to sell well at Mulrok Trade Hall (see Chapter 4.8). Thus, after progressing from Daggers through to Scimitars for any particular weapon type & crafting a bunch of tools on the side, a weaponcrafter should then aim to convert all their leftover metal into Greatswords, which can then either be salvaged + used to make more Greatswords until said metal is exhausted, or sold at Mulrok Trade Hall for a profit.
Finally, it is important that miners have access to some form of rock destruction. Mineral deposits in mines appear in clumps of metals of a similar difficulty (e.g. shadow+rubicite+syenite+verdicite), and respawn after a period of time into a random mineral. Often a crafter can be stuck in a situation where not a single mineral deposit in a mine has respawned as the mineral that they’re after. Thankfully, there are 3 spells which will remove a mineral deposit so that it respawns as something else. These are:
- Harm (Cleric level 6 spell, Druid level 7 spell. Works in conjunction with damaging the rock, using something other than a Pickaxe [fists work]);
- Destruction (Cleric level 7 spell);
- Wail of the Banshee (Wizard and Sorcerer level 9 spell. Must be targeted directly at the rock).
For crafters who don’t have access to these spells, Semli’s Helmet (a reasonably difficult helmet in armour crafting, see Chapter 8) has 1 harm spell per day. For those who don’t have this option available, logging in a specialised ‘rock destroyer’ character (see Chapter 2.5) that is packing said spells, works as well.
7.2 Weaponcrafting Metal Properties & Recipes
Standard weapons can be made from metals ranging from Copper to Verdicite, with some recipe item weapons requiring higher level metals (i.e. Mithral/Adamantine/Myrkanite). Some weapons require Oak staves, which are chopped from trees (see Chapter 3.5). Copper ingots can also be purchased from the tinkering merchant.
Metal properties for Daggers are as follows (other weapons may vary slightly):
- Copper Properties: Weight Reduction 80%.
- Bronze Properties: Attack Bonus +1.
- Iron Properties: Enhancement Bonus +1.
- Silver Properties: Enhancement Bonus vs. Undead +2, Enhancement Bonus vs. Shapechangers +2, Saving Throws vs. Fear +2.
- Gold Properties: Enhancement Bonus +2, Electrical 1d4 Damage, Light 10m (Yellow).
- Shadow Properties: Enhancement Bonus +2, On Hit Ability Drain DC-14 Constitution.
- Verdicite Properties: Enhancement Bonus +3, Acid 1d4 Damage.
There is also a small chance that non-recipe-item crafted weapons can be ‘Exceptional’ weapons (around 10%), which come with slightly boosted stats compared to ordinary weapons.
Typical Exceptional Bonuses (on top of the standard bonuses) for Weapons include:
- Increased Elemental Damage (from 1d4 to 1d6),
- Additional elemental damage and enhancement vs. Racial types (Silver only),
- Light Bonus for weapons that already give Light,
- 1d6 Massive Criticals,
- Weight Reduction,
- Enhancement increases from +3 to +4 for Exceptional Verdicite Weapons of all types.
Finally, here are the recipes for each weapon type, in the order that they appear in the Anvil.
Axes:
- Handaxe: 4 Ingots.
- Double Axe: 12 Ingots, 1 Short Oak Stave.
- Dwarven Waraxe: 10 Ingots.
- Battleaxe: 6 Ingots.
- Greataxe: 8 Ingots.
- Blade of the Gargoyle. Base Item Battleaxe. Special Properties: Slashing 1d6 Damage, Enhancement Bonus +2, Use Stoneskin (7) 1 Use / Day. Ingredients: 15 Adamantine Ingots, 4 Gargoyle Skulls, 2 Black Dragon Scales. Side note: As a battleaxe is itself a slashing weapon, the enhancement bonus and slashing damage DO NOT STACK. As such as a standard weapon, this only deals 1d6 slashing damage (no enhancement). If buffed with Greater Magic weapon, the enhancement overrides, and the weapon no longer deals 1d6 slashing damage.
- Mage Hunter Axes. Base Item: Throwing Axe (50). Special Properties: Enhancement Bonus +2, On Hit Silence DC-14 5% / 5 Rounds. Ingredients: 10 silver ingots, 5 short oak staves, 2 Will’o’Wisp Essences.
- Golden Axes of Holding. Base Item: Throwing Axe (50). Special Properties: Enhancement Bonus +2, On Hit Hold DC-14 5% / 5 Rounds. Ingredients: 10 gold ingots, 5 short oak staves, 2 Ettercap’s Silk Glands.
- Verdicite Throwing Axes. Base Item: Throwing Axe (50). Special Properties: Enhancement Bonus +2, 1d6 Acid Damage. Ingredients: 10 Verdicite ingots, 5 short oak Staves, 1 Quartz Crystal.
- Skeleton Axes. Base Item: Throwing Axe (50). Special Properties: Enhancement Bonus +2, Enhancement Bonus vs. Undead +4, Extra Ranged Damage Bludgeoning. Ingredients: 10 Mithral Ingots, 5 Short Oak Staves, 5 Skeleton Knuckles, ONE +1 THROWING AXE (contrary to recipe).
- Dwarven Waraxe (the recipe item, not to be confused with the standard crafted dwarven waraxe). Base Item: Dwarven Waraxe. Special Properties: 1 Slashing Damage, Only Usable by Dwarf. Ingredients: 6 Mithral Ingots, 6 Iron Ingots, 1 Ironwood.
Blades:
- Dagger: 2 Ingots.
- Longsword: 6 Ingots.
- Two-Bladed Sword: 12 Ingots, 1 Short Oak Stave.
- Greatsword: 8 Ingots.
- Bastard Sword: 8 Ingots.
- Shortsword: 4 Ingots.
- Katana: 9 Ingots.
- Katana Masterwork – Mithral: 2 Gold Ingots, 9 Mithral Ingots. Special Properties: Enhancement Bonus +3, Damage Bonus vs. Evil 1d4 Positive. The 1 slashing damage is redundant as a katana is a slashing weapon, so enhancement takes priority.
- Katana Masterwork – Black: 2 Iron Ingots, 9 Shadow Ingots. Special Properties: Enhancement Bonus +3, Damage Bonus vs. Good 1d4 Negative. The 1 slashing damage is redundant as a katana is a slashing weapon, so enhancement takes priority.
- Rapier: 5 Ingots.
- Scimitar: 6 Ingots.
- Swift Tooth. Base Item: Rapier. Special Properties: Attack Bonus vs. Evil +2, Dexterity +1, On Hit Slow DC-14 25% / 3 Rounds, Summon Creature V (9) 1 Use/Day. Ingredients: 8 Shadow Ingots, 4 Will’o’Wisp Essences.
- Brock’s Dagger of Mithral. WINGS QUEST ITEM. Base Item: Dagger. Special Properties: Attack Bonus 3, Piercing 3 Damage, On Hit Daze DC-14 25% / 3 Rounds. Ingredients: 6 Mithral Ingots, 1 Scroll of Daze, 1 Oil of Vukas (see Chapters 3.6 and 14.2 for more info), 1 Will’o’Wisp Essence.
- Flame Dagger. Base Item: Dagger. Special Properties: 1 Fire Damage. Ingredients: 2 iron ingots, 2 Fire Beetle’s Bellies.
- Glimmering Shortsword of Crimson. Base Item: Shortsword. Special Properties: Enhancement Bonus +1, Vampiric Regeneration +3, Light 20m (Red). Ingredients: 2 Scrolls of Light, 8 Rubicite Ingots.
- Golden Rapier of the Cortier. Base Item: Rapier. Special Properties: Enhancement Bonus +1, Charisma +1, On Hit Hold DC-14 50% / 2 Rounds, Persuade +1. Ingredients: 2 Dragon Blood, 4 Will’o’Wisp Essences, 10 Gold Ingots.
- Biting Bastard Blade. Base Item: Bastard Sword. Special Properties: Enhancement Bonus +3, Piercing 1d4 Damage, Fire 1d6 Damage vs. Undead, Keen. Ingredients: 10 gold ingots, 10 iron ingots, 3 Bodak’s Teeth, 3 Dragon Blood. A decent choice for ‘non-Fire’ Elemental Gem Upgrades (see Chapter 13.5).
- Longsword of Algoroth. Base Item: Longsword. Special Properties: Enhancement Bonus +3, 1d6 Cold Damage, Keen. Ingredients: 20 mithral ingots, 2 Lich Skulls, 4 Ideal Rubies, 1 Recipe.
- Capricious Blade. Base Item: Dagger. Special Properties: Enhancement Bonus +3, On Hit Stun DC-22 50% / 3 Rounds. Ingredients: 5 mithral ingots, 1 Red Dragon Scale, 1 Fairy Dust, 1 Recipe. A decent ‘starter item’ choice for Elemental Gem Upgrades (see Chapter 13.5).
- The Haze. Base Item: Shortsword. Special Properties: Enhancement Bonus +3, 1d6 Acid Damage, Keen. Ingredients: 10 mithral ingots, 4 Ideal Emeralds, 2 Red Dragon Scales, 1 Recipe.
- Katana of the Dragons. Base Item: Katana. Special Properties: Enhancement Bonus +4, Piercing 5 Damage, Keen, Discipline +9, Use Special Power Epic Upgrade. Ingredients: 20 Dragon Blood, 10 Ancient Red Dragon Hearts, 10 Blue Dragon Breath Glands, 20 Adamantine Ingots. The Katana of the Dragons is the best available crafted weapon to combine with Elemental Gems (see Chapter 13.5), as the Piercing Damage stacks with Enhancement. It also comes with a special one-time option to be ‘upgraded’ to an Epic Weapon. This boosts its’ Enhancement from +4 to +5, but also makes it non-drop, and cannot be reversed.
Blunts:
- Mace: 3 Ingots.
- Light Flail: 5 Ingots.
- Heavy Flail: 7 Ingots.
- Dire Mace: 10 Ingots.
- Morningstar: 8 Ingots.
- Light Hammer: 4 Ingots.
- Warhammer: 8 Ingots.
- Golden Mace of Confinement. Base Item: Mace. Special Properties: Enhancement Bonus +1, Massive Criticals 1d4, Web (3) 3 Uses/Day. Ingredients: 3 gold ingots, 2 Ettercap’s Silk Glands.
- The Growl. Base Item: Warhammer. Special Properties: Enhancement Bonus +3, On Hit Confusion DC-16 75% / 1 Round, On Hit Deafness DC-16 50% / 2 Rounds. Ingredients: 15 Adamantine, 2 Blue Dragon Breath Glands, 2 Ideal Emeralds, 1 Recipe.
Polearms:
- Quarterstaff: 2 Ingots, 1 Long Oak Stave.
- Halberd: 7 Ingots, 1 Long Oak Stave.
- Scythe: 8 Ingots, 1 Long Oak Stave.
- Spear: 2 Ingots, 1 Long Oak Stave.
- Quarterstaff of Fear. Base Item: Quarterstaff. Special Properties: Enhancement Bonus +2, Acid 1d6 Damage, On Hit Fear DC-14 25% / 3 Rounds. Ingredients: 1 Quarterstaff +1, 4 Will’o’Wisp Essences, 2 Black Dragon Livers, 5 Mithral Ingots.
- Quarterstaff of Wounding. Base Item: Quarterstaff. Special Ingredients: Enhancement Bonus +3, On Hit Wounding DC-16. Ingredients: 1 Quarterstaff +1, 5 Mithral Ingots, 5 Adamantine Ingots, 2 Dragon Blood, 2 Bodak’s Teeth.
Exotic:
- Kama: 2 Ingots.
- Kukri: 4 Ingots.
- Sickle: 4 Ingots.
- Composite Longbow of Distant Death (yes, this is a longbow, in the exotic weapons section). Base Item: Longbow. Special Properties: Attack Bonus +4, Dexterity +3, Mighty +4. Ingredients: 4 Ironwood, 10 Mithral Ingots, 4 Will’o’Wisp Essences.
- The Harvester. Base Item: Scythe. Special Properties: Enhancement Bonus +3, On Hit Dispel Magic DC-14. Ingredients: 10 Mithral Ingots, 10 Adamantine Ingots, 2 Lich Skulls, 1 Plague Demon Horn, 1 Recipe.
- Curved Death. Base Item: Kukri. Special Properties: Enhancement Bonus +3, Light 20m (White), On Hit Blindness DC-20 75% / 1 Round. Ingredients: 5 Mithral Ingots, 1 Ancient Red Dragon Heart, 1 Ideal Diamond, 1 Recipe.
- Demonic Fury. Base Item: Scimitar. Special Properties: Enhancement Bonus +3, Animate Dead (15) 1 Use/Day, Vampiric Regeneration +2. Ingredients: 15 Mithral Ingots, 2 Plague Demon Horns, 1 Recipe.
- The Screaming Cleaver. Base Item: Kukri. Special Properties: Enhancement Bonus +4, Keen, Massive Criticals 1d10, Attack Bonus vs. Undead +5, Damage Bonus vs. Undead 1d10 Sonic, Decreased Hide -6, Decreased Move Silently -6. Ingredients: 5 Mithral Ingots, 5 Adamantine Ingots, 5 Ideal Diamonds, 1 Lich Skull, 1 Bodak’s Tooth, 5 Skeleton’s Knuckles, 1 Recipe. A decent choice for ‘non-Sonic’ elemental gem upgrades (see Chapter 13.5).
Ammunition:
- Basic Arrowhead: 1 Iron Ingot.
- Hooked Arrowhead: 1 Iron Ingot.
- Bladed Arrowhead: 1 Iron Ingot.
- Advanced Arrowhead: 1 Iron Ingot.
- Mithral Arrowhead: 1 Mithral Ingot.
Tools:
Most (not all) crafted tools range from Copper to Shadow. There are also two near-unbreakable Mithral Tools (Pickaxe, Smithing Hammer), which have a small chance of being received as rewards for completing Crafting Order Quests (see Chapter 4.7).
- Smithing Hammer: 4 Ingots.
- Pickaxe: 5 Ingots.
- Skinning Knife: 3 Ingots.
- Paring Knife: 3 Ingots.
- Fletching Knife: 3 Ingots.
- Tinkering Tool: 3 Ingots.
Chapter 8: Armourcrafting
8.1 Armourcrafting Item Management + Skill Levelling Tips
Once mining/smithing/weaponcrafting have been levelled, armourcrafting should be next on the list. Armourcrafting is the craft concerned with making helmets, medium & heavy armours, and shields of all sizes. This makes it a useful counterpart to Tailoring, where Robes & Light Armour are instead the focus. Unlike Weaponcrafting, which can be progressed through using metals alone, Armourcrafting also requires animal hides. This, combined with the fact that armours typically require a lot more ingots to manufacture than weapons do, makes it a more difficult craft to level. Hence why all crafts required to support it (mining/smithing/weapons/tanning) are recommended to be completed first!
There are a large range of armours available to make, and the best armours for levelling purposes are those that use the least amount of metal. Armourcrafting starts off with Copper Studs > Copper Helmets > Copper Scale Mail (requires Cured Medium Leather Hide), and can then be progressed through Copper to Gold using the following item sequence: Chain Shirt, Chainmail, Breastplate, Small Shield (requires Tanned Small Leather Hide), Half Plate, Helmets for next metal, repeat. This progression ensures that only required Badger Hides are required from Tanning, except for the initial ‘copper scale mail’ production phase.
Much like with weapons, crafted armours can be placed back into a Forge and salvaged. Recycled materials can then be used again to make more armours & further level up armourcrafting. Half Plates are the most profitable item type to sell at Mulrok Tradehall (see Chapter 4.8), so once an armourcrafter has progressed through to the ‘next’ metal type, they should aim to convert all their ‘leftover metal’ into Half Plates, which can then either be salvaged + used to make more Half Plates until said metal is exhausted, or sold at Mulrok Trade Hall for a profit.
8.2 Armourcrafting Recipes
Standard armour, helmets and shields can be made from metals ranging from Copper to Mithral, with some recipe item armours requiring Adamantine & Myrkanite. The crafting merchant (blacksmith) sells cloth padding and crafted studded leather armour, whilst cured/tanned/hardened hides are skinned from animals and crafted via Tanning (see Chapter 6). Copper ingots can also be purchased from the tinkering merchant.
Metal properties for medium body armour are as follows (bludgeoning replaces slashing resistance for heavy armour, helmets and shields vary slightly):
- Copper Properties: Weight Reduction 80%.
- Bronze Properties: Acid Resistance 5 / –
- Iron Properties: AC Bonus +1.
- Silver Properties: AC Bonus +1, AC Bonus vs. Undead +4, Only Usable by Non-Evil characters.
- Gold Properties: AC Bonus +2, Electrical Resistance 5 / -, Slashing Resistance 5 / -, Saving Throw vs. Electrical +1.
- Shadow Properties: AC Bonus +2, Slashing Resistance 5 / -, Magical Resistance 5 / -, Spell Resistance 10, Only Usable by Non-Good Characters.
- Verdicite Properties: AC Bonus +3, Acid Resistance 10 / -, Slashing Resistance 5 / -, Saving Throws vs. Acid +2.
- Rubicite Properties: AC Bonus +3, Fire Resistance 10 / -, Slashing Resistance 5 / -, Saving Throws vs. Fire +2.
- Syenite Properties: AC Bonus +3, Fire Resistance 10 / -, Slashing Resistance 5 / -, Saving Throws vs. Cold +2.
- Mithral Properties: AC Bonus +3, Magical Resistance 5 / -, Negative Resistance 5 / -, Slashing Resistance 5 / -, Weight Reduction 60%.There is also a small chance that non-recipe-item crafted armour items can be ‘Exceptional’ items (around 10%), which come with slightly boosted stats compared to ordinary armour items.
Typical Exceptional Bonuses (on top of the standard bonuses) for Armour include:
- Increased Elemental Resistance for armour that already grants elemental resistance,
- +1 AC for some armour (e.g. standard Mithral Armour gives +3 AC, exceptional gives +4 AC),
- Discipline Bonuses,
- Saving Throw Bonuses, dependant on the resistances of the particular armour (so for e.g Rubicite is fire resistant armour, so Exceptional rubicite armour grants extra Saves vs. Fire.) ,
- Weight Reduction.
Some Exceptional Armour comes with significant added bonuses, on top of the ordinary exceptional boosts. These bonuses make certain exceptional crafted armour items very valuable to crafters and adventurers alike. These include:
- Exceptionally Crafted Syenite Small/Large/Tower Shield: Haste.
- Exceptionally Crafted Rubicite Chainmail Coif: Haste.
- Exceptionally Crafted Rubicite Chainmail: Immunity to Knockdown.
- Exceptionally Crafted Rubicite Half-Plate: Haste.
- Exceptionally Crafted Rubicite Full-Plate: Haste.
- Exceptionally Crafted Rubicite Small/Large/Tower Shield: Immunity to Level/Ability Drain, Disease and Poison.
- Exceptionally Crafted Mithral Chainmail Coif: Immunity to Knockdown.
- Exceptionally Crafted Mithral Chainmail: Haste, 25% Negative Damage Immunity (replaces negative resistance).
- Exceptionally Crafted Mithral Small/Large/Tower Shield: Immunity to Knockdown.
- Exceptionally Crafted Mithral Half-Plate: Immunity to Knockdown, 25% Negative Damage Immunity.
- Exceptionally Crafted Mithral Full-Plate: Immunity to Knockdown, 25% Negative Damage Immunity.
In addition to these, Crafted Yellow Robes grant Haste, and Crafted White Robes + Ultimate Yellow Belt grant Immunity to Knockdown (more info on Tailoring items in Chapter 5).
Next, here are the recipes for each weapon type, in the order that they appear in the Anvil.
Body Armour:
- Scale Mail: 6 ingots, 1 Cured Medium Leather Hide.
- Chain Shirt: 8 Ingots, 1 Cloth Padding.
- Chainmail: 16 ingots, 2 Cloth Padding.
- Breastplate: 22 Ingots, 1 Crafted Studded Leather Armour.
- Splint Mail: 16 Ingots, 2 Cured Large Leather Hide, 3 Cloth Padding.
- Banded Mail: 20 Ingots, 2 Tanned Large Leather Hide, 3 Cloth Padding.
- Half-Plate: 28 Ingots. Good for mass production (see Chapter 4.8)
- Full-Plate: 40 Ingots, 2 Hardened Large Leather Hide.
- Windwalker Breastplate. Base Item: Breastplate. Special Properties: Armour Bonus vs Undead: +1 AC, Damage Immunity Increased: Slashing 5%, Dexterity +2, Improved Saving Throws vs Fear +2, Reduced Saving Throws vs Electrical -1, Call Lightning (10) 1 Use/Day, Color Spray (2) 3 Uses/Day, Lightning Bolt (5) 3 Uses/Day, Weight Reduction 40%. Ingredients: 22 Silver Ingots, 1 Crafted Studded Leather Armour, 2 Blue Dragon Breath Glands.
- Drow Chainmail. Base Item: Chainmail. Special Properties: AC Bonus vs. Good +2, AC Bonus vs. Lawful +2, 5/- Cold Resistance, 5/- Fire Resistance, 5/- Piercing Resistance, 20% Weight Reduction, Only Usable By Elf, Only Usable by Evil. Ingredients: 1 Scroll of Shades, 16 Shadow Ingots, 8 Cloth Padding.
- Braveheart. WINGS QUEST ITEM. Base Item: Breastplate. Special Properties: 30/- Fire Resistance, Improved Saving Throws vs. Fire +5, Light 15m (Red). Ingredients: 24 Rubicite Ingots, 1 Crafted Studded Leather Armour, 2 Ancient Red Dragon Hearts.
- Fire-Blasted Red Plate. Base Item: Full Plate. Special Properties: AC Bonus vs. Dragons +6, AC Bonus +4, 30/- Fire Resistance, Immunity to Fear, Light 20m (Red), Discipline +10, Weight Reduction 80%. Ingredients: 30 Mithral Ingots, 30 Rubicite Ingots, 1 Crafted Studded Leather Armour, 10 Ancient Red Dragon Hearts, 20 Red Dragon Scales, 20 Dragon Blood. Maximum Crafting Rating: Blue.
- Gold Dragon Armour. Base Item: Full Plate. Special Properties: AC Bonus +4, 20/- Electrical Resistance, Light 15m (Yellow), Regeneration +1, Weight Reduction 40%. Ingredients: 30 Gold Ingots, 1 Recipe, 2 Blue Dragon Breath Glands, 10 Red Dragon Scales, 2 Ancient Red Dragon Hearts, 2 Large Hardened Hides.
- Armour of the Black Knight. Base Item: Full Plate. Special Properties: AC Bonus vs. Good +5, AC Bonus +4, Regeneration +1, Weight Reduction 60%, Only Usable by Evil, Only Usable by Neutral. Ingredients: 2 Large Hardened Black Hides, 25 Shadow Ingots, 1 Ancient Red Dragon Heart, 1 Lich Skull, 1 Plague Demon Horn, 1 Recipe.
- Armour of the White Knight. Base Item: Full Plate. Special Properties: AC Bonus vs Evil +5, AC Bonus +4, Regeneration +1, Weight Reduction 60%, Only Usable by Good, Only Usable by Neutral. Ingredients: 2 Large Hardened White Hides, 25 Mithral Ingots, 1 Ancient Red Dragon Heart, 1 Lich Skull, 1 Plague Demon Horn, 1 Recipe.
- Rainbow Rainment. Base Item: Chainmail. Special Properties: AC Bonus +5, Only Usable by Chaotic, Only Usable by Neutral, Immunity to Colour Spray, Immunity to Prismatic Spray, Colour Spray (2) 3 Uses/Day, Prismatic Spray (13) 1 Use/Day, 80% Weight Reduction. Ingredients: NO TANNED HIDES (contrary to recipe), 5 verdicite ingots, 5 rubicite ingots, 5 syenite ingots, 10 silver ingots, 3 Ideal Diamonds, 1 Scroll of Prismatic Spray, 1 Recipe.
Helmets:
- Open Helm: 7 Ingots.
- Chainmail Coif: 10 Ingots.
- Helm of the Gargoyle. Base Item: Helmet. Special Properties: AC Bonus +2, Use Stoneskin (7) 2 Uses/Day. Ingredients: 8 adamantine ingots, 4 Gargoyle Skulls.
- Semli’s Helm. Base Item: Helmet. Special Properties: Light 10m (White), Concentration +2, Discipline +10, Harm (11) 1 Use/Day, Mass Heal (15) 1 Use/Day. Ingredients: 10 Adamantine Ingots, 10 Myrkanite Ingots, 10 Mithral Ingots, 1 Philema’s Eye, 5 Rakshasa’s Eyes, 3 Potions of Heal. Semli’s Helmets come with 1 Harm spell/day, and so a ‘non-spellcasting miner’ can use a collection of them for rock destruction if necessary (see Chapter 7.1).
Shields:
- Small Shield: 4 Ingots, 1 Tanned Small Leather Hide.
- Large Shield: 6 Ingots, 1 Tanned Medium Leather Hide.
- Tower Shield: 8 Ingots, 1 Tanned Large Leather Hide.
- Trebor’s Barricade. Base Item: Large Shield. Special Properties: AC Bonus vs. Chaotic +1, AC Bonus vs. Evil +1, DR +2 Soak 5, Intelligence +2, Regeneration +1. Ingredients: 16 Rubicite Ingots, 1 Lich Skull, 2 Medium Tanned Hides.
- Shield of Algoroth. Base Item: Large Shield. Special Properties: AC Bonus +4, Fire Immunity 25%. 2 Large Tanned White Hides, 10 Ingots of Silver, 1 Plague Demon Horns, 5 Red Dragon Scales, 1 Recipe.
Miscellaneous:
- Copper Stud (1): 1 Copper Ingot.
- Drake’s Charm of Passage. WINGS QUEST ITEM. Base Item: Amulet. Ingredients: 4 gold ingots, 2 cut emeralds, 1 scroll of knock.
8.3 Synergy Sets
Some specific items (primarily from armour crafting), grant special additional bonuses when worn together. These bonuses only show up when the items are equipped, and are marked as ‘temporary’. These are known as ‘synergy’ bonuses, so a collection of items worn together that provide these can be referred to as a synergy set.
There are a few synergy sets available through crafting which yield synergy bonuses.
These are:
- Verdicite Synergy Set (armour, helm, shield): 25/- Acid Resistance (30 for exceptional), Immunity: Poison, Light 15m (Green).
- Syenite Synergy Set (armour, helm, shield): 25/- Cold Resistance (30 for exceptional), -2 saves vs fire, Spell Immunity: Cone of Cold, Light 15m (Blue).
- Rubicite Synergy Set (armour, helm, shield): 25/- Fire Resistance (30 for exceptional), -2 saves vs cold, Spell Immunity: Firebrand, Light 15m (Red).
- Mithral Synergy Set (armour, helm, shield): -40% Arcane Spell Failure (-50% with all exceptional items), 5/- Piercing Resistance, Immunity: Fear, Light 15m (White). Currently the most useful of the synergy sets, allowing Exceptional Chainmail + Shield + Helmet to be worn by spellcasters with no casting penalty, as well as granting Fear immunity.
- Algoroth Synergy Set: EACH INDIVIDUAL ITEM GETS A BONUS.
Sword (Weaponcrafting): Enhancement Bonus vs Dragons +6, 2d8 Massive Criticals.
Armour (Tailoring): +6 AC vs. Dragons, +2 Reflex Saves.
Shield (Armourcrafting): +6 AC vs. Dragons.
There is also the ‘Hotenow item’ set, which is a very powerful non-crafted Synergy set. More details in Chapter 13.5.
Chapter 9: Gemcutting and Jewelrycrafting
9.1 Gemcutting/Jewelrycrafting Introductions, Item Management + Skill Levelling Tips
Gemcutting is a secondary craft that is purely concerned with cutting gems. Jewelrycrafting meanwhile is a primary craft concerned with using cut gems + metal ingots to create magical rings and amulets. Both crafts rely on Mining & Smithing, and are also easier to manage with access to mining bags (see Chapters 4.4, 5.2 and 6.3), hence why they should be attempted after Mining/Smithing/Tailoring/Tanning at the very least. Like Mining/Smithing + Weaponcrafting, Gemcutting + Jewelry are very easy to level in tandem with each other, hence they are lumped together into the same chapter.
Gemcutting requires a Gemcutter’s chisel, which is a portable crafting item (similar to the Sewing Kit) that can be purchased or crafted using Weaponcrafting (see Chapter 7.2). Jewelrycrafting meanwhile requires a jewelry table and a Gemsetter tool, which can also be purchased or crafted via Weaponcrafting. Gemcutting is straightforward to level (simply cut gems in order of difficulty, see Chapter 9.2), whilst Jewelrycrafting is less straightforward, though can be roughly summarised as ‘make rings in order of gem & metal difficulty’ (as rings use less metal than amulets do). Jewelry of all kinds sells quite well overall at Mulrok Trade Hall (see Chapter 4.8), and so it is definitely worth keeping hold of any crafted rings & storing them in mining bags to sell later.
It’s worth noting that the beginning of Gemcutting involves cutting store-bought items from the jewelry merchant (Malachite & Amethyst), and then afterwards cutting rough mined gems. Gemcutting should naturally level whilst gathering the materials needed for Jewelrycrafting, and should quite easily outpace Jewelry in terms of speed of levelling. This means that a crafter shouldn’t have any issues having to cut ‘excess gems’ in order to level Gemcutting.
Generally, Jewelry item difficulty tends to progress such that multiple gem types can be used to create items of the same metal type, before then ‘levelling up’ to the next metal type. E.g. Copper Rings will progress through several gem types (starting from Malachite then through to Amethyst etc.), before Bronze rings become available. However, this rigid pattern only holds for so long, and Jewelry reaches a point where a lot of ring and gem types are craftable simultaneously at the same skill level. Thus, it is a good idea to store ‘lots’ of different ingot and gem types in bags whilst leveling Jewelrycrafting (which can get chaotic!), and to pay the odd visit to metal mines to restock on various ingot types.
Though there are quite a few gem mines around Nordock, there are two mines of note. The first is the Benzor Fair mine, which costs 40,000gp to access for one reset on weekends (see Chapter 13.2), but contains exclusively Diamond and Myrkanite. Diamond Myrkanite rings are the final item type that can be used to level Jewelrycrafting to 400, and are available to make from around 300 skill onwards, though should be delayed in favour of other items as these two materials are very difficult to process, and require collecting an awful lot of them. Good thing that the Benzor Fair Mine has an awful lot of them!
The second mine of note is the Chaullsin Gem Mine, which contains large amounts of every gem type available, dwarfing every other gem mine by a considerable margin. To access this mine, one can make a Drow crafter or miner specifically for this mine, or alternatively, other factions can reach the mine by utilising Invisibility and various transport merchants.
The quickest way to reach the mine from the surface, is to head to Loknar and use the portal located at the southern end of the city to travel to Chaullsin (the portal works for Surfacers). Once a Surfacer has stocked up sufficiently on Pickaxes, they should head underneath Sholo to the Gloomy Dark. Once inside the Gloomy Dark, keep following the cavern until a hole in the ground/transition is reached, which will pop out at the SW corner of the map. Once through, north from here leads to Mak’a’nor (location of the Glittering Mines), and East to Underdark Deep Caverns. Head east.
Inside the Deep Caverns, northeast of this sector is the Bharat Duergar Lair containing Blackberry Gems (WINGS QUEST ITEM), and to the east is Loknar. Head East, to East Deep Caverns. At the eastern edge of this map is the gate to Loknar, which is guarded by lots of Drow Guards and the Drow High Priestess (whose head happens to be ANOTHER WINGS QUEST ITEM). This is a good time to use Invisibility to sneak East into Loknar, past all of the guards.
Once inside Loknar (the character will appear at the north eastern corner), head directly South, through a gate, to the docks, and there will be a Portal (which surfacers can use) to Underdark Central & Chaullsin. Take the portal to Chaullsin, and head towards the centre of the map. The mine entrance is located there, inside a stone hut with a sloping roof. The first mining sector will contain metals, and the second area will contain gems, with high end gems inside the east, north and west side areas of the map.
Once a Surfacer is done mining, the ‘safest’ exit involves using the Nordock Stone of Heroes to port to the Epic Store. This is found at the northern edge of the Royal Quarter, which itself can be accessed on the north side of Chaullsin near the portal. Happy gem mining!
9.2. Gemcutting and Jewelry Item Stats & Recipes
Standard rings/amulets are crafted from metal ingots (2 per ring, 3 per amulet), a smooth ring/amulet mold (bought from the jewelcrafter merchant) and gems (1 per ring/amulet). Properties are granted to jewelry BOTH from the gem used, AND the metal used.
The types of Gems & their stats (in order of increasing difficulty) include:
- Malachite (+1 Strength)
- Amethyst (+1 Charisma)
- Lapis Lazuli (+1 Dexterity)
- Turquoise (+1 Constitution)
- Opal (+1 Wisdom, +1 Will Save, -1 Strength unless Ideal, Only Usable by Good and Neutral)
- Onyx (+1 Dexterity, +1 Reflex Save, -1 Strength unless Ideal)
- Jade (+1 Intelligence)
- Pearl (+1 Wisdom)
- Sapphire (+2 Wisdom, +4 Wisdom in Mithral Jewellry, +1 Saves vs. Negative Energy, -1 Constitution unless Ideal)
- Black Sapphire (+2 Dexterity, +1 Saves vs. Positive Energy, -1 Charisma unless Ideal, only usable by Evil)
- Fire Opal (+2 Charisma, +1 Fortitude Save, Decreases Dexterity unless Ideal)
- Ruby (+2 Constitution, +4 Constitution in Mithral Jewellry, +1 Saves vs. Mind Spells)
- Emerald (+2 Dexterity, +1 Saves vs. Fear)
- Diamond (+2 Intelligence, Universal Saves +1)
There is a small chance that a cut gem will be an Ideal Gem (around 5-10%). Ideal Gems provide DOUBLE THE BONUS (abilities and saves) of an ordinary gem (+2 instead of +1 & +4 instead of +2), and often also remove the negative effects associated with that gem. Malachite and Amethyst can be bought from the Jewelry merchant, and all gems can be mined.
Although gems provide the majority of the bonus given by a particular ring/amulet, metals do provide small bonuses of their own. NOT ALL METALS WILL HOUSE A PARTICULAR GEM HOWEVER (check the Jeweler’s desk for more information about this).
Next, the Metal Properties granted to Jewelry include:
- Copper: Reduced Saves vs. Fire -1.
- Bronze: 5 / – Acid Resistance, Fire Vulnerability 5%.
- Iron: Saves vs. Sonic +1.
- Silver: AC Bonus vs. Undead +1, Reduced Saves vs. Electrical -1.
- Gold: 10 / – Electrical Resistance, Light 15m (Yellow).
- Shadow: Spell Resistance 16, Only Usable by Non-Good Alignments.
- Rubicite: 5 / – Fire Resistance, Light 5m (Blue), Saving Throws vs. Fire +1.
- Verdicite: Light 5m (Green), Saving Throws vs. Poison +2.
- Syenite: 5 / – Cold Resistance, Light 5m (Blue), Saving Throws vs. Cold +1.
- Mithral: Double Ability Bonus for Ruby and Sapphire (though only +1 bonus for Ideal Rubies & Sapphires, increasing from +4 to +5), Light 15m (Blue).
- Adamantine: None.
- Myrkanite: None.
These metal properties are added to gem properties. For example, a Copper Malachite Ring will be: +1 strength (from Malachite), and -1 saves vs Fire (Copper).
There is a small chance that non-recipe-item crafted jewelry items can be ‘Exceptional’ items (around 10%), which come with slightly boosted stats compared to ordinary jewelry.
Typical Exceptional Bonuses (on top of the standard bonuses) for Rings and Amulets include:
- Increased Elemental Resistance for jewellery that already grants elemental resistance (so for e.g. instead of 10 / – this becomes 15 / -)
- +1 Deflection AC
- Some exceptional jewellery can only be used by good alignments (be careful about this)
- Light Bonus for rings that already give Light (so light 15m as opposed to light 5m)
Exceptional jewellery is NOT to be confused with Ideal Gems, explained earlier in this Chapter.
One thing to note about Exceptional Jewelry, is that it is the only type of jewelry that can have Elemental Gems added to it. This is because the +1 AC bonus that is granted to Exceptional Jewelry, is required to add gems to non-weapon items (which require +1 Attack Bonus or Enhancement instead). Standard jewelry has no AC bonus, and so gems cannot be added to them. See Chapter 13 for more info.
Finally, there are special recipe rings/amulets which require other components. These are:
Rings:
- Mortike’s Ring. Base Item: Ring. Special Properties: DR +1 Soak 5, Darkvision, Constitution +3, Improved Saving Throws vs. Mind +2, Light 15m (Red). Ingredients: 1 Ring Mold, 2 Rubicite Ingots, 1 Cut Ruby, 1 Scroll of Light, 1 Scroll of Ghostly Visage, 1 Fenberry.
- Greater Mortikie’s Ring. Base Item: Ring. Special Properties: DR +3 Soak 5, Darkvision, Constitution +4, Saving Throws vs. Mind +2, Light 15m (Red). Ingredients: 1 Recipe, 1 Mortikie’s Ring, 2 Rubicite Ingots, 1 Ideal Ruby.
- Fire Ring. Base Item: Ring. Special Properties: 50 Charges Total, Fire Immunity 25%, Use Fire Storm (13) 2 Charges/Use, Use Fireball (10) 1 Charge/Use: 1 Scrolls of Delayed Blast Fireball, 1 Scroll of Flame Arrow, 1 cut diamond, 1 Recipe.
Amulets:
- Amulet of Senses. Base Item: Amulet. Special Properties: Bonus Feat: Alertness, Listen +8, Search +8, Spot +8, Use Clairaudience/Clairvoyance (15) 2 Uses/Day. Ingredients: 1 Lesser Amulet of the Master, 1 Recipe, 1 Ideal Emerald.
- Amulet of Chronos. Base Item: Amulet. Special Properties: 48 Charges Total, Use Time Stop (17) 4 Charges/Use. Ingredients: 1 Ideal Diamond, 2 Scrolls of Timestop, 1 Recipe.
- Amulet of Necromancer. Base Item: Amulet. Special Properties: 50 Charges Total, Only Usable by Evil, Only Usable by Wizard, Use Animate Dead (15) 1 Use/Day, Use Sunbeam (15) 5 Charges/Use. Ingredients: 1 Recipe, 5 Scrolls of Animate Dead, 1 Ideal Emerald.
Chapter 10: Tinkering
10.1 Tinkering Introduction, Item Management + Skill Levelling Tips
Tinkering is a primary craft which involves making mechanical components and devices (which includes traps), as well as bow strings and bow pulleys for Bowyering (hence why Tinkering is recommended first!), and magical artifacts of various kinds (including two distinct high-end magic items, the Clock of Ages and the Personal Locator Beacon). Materials are primarily made from metals ranging from copper to gold, cured badger leather, and essences bought from the merchant, whilst items are crafted using Tinkering Tools at a Tinkering Toolset. Copper ingots can be bought in ‘packages of 10’, and must be activated/used to obtain the ingots. This means that, for a Surfacer at least, most ingredient gathering and making for tinkering, can be done within the vicinity of Benzor.
This, however, does not stop Tinkering from being arguably the most tedious craft on offer. Patience, Intelligence buffs and above all, a CLEAN WORKABLE INVENTORY are the keys to succeeding and levelling up quickly in this craft. The main frustration with Tinkering comes from the fact that whilst the materials are easy to acquire, crafted items in Tinkering tend to be COMPONENTS FOR OTHER ITEMS.
This requires a lot of time spent at the Toolset crafting ‘green’ items, to use later for other ‘not-green items’ and gain skills, as there are effectively multiple tiers of items requiring crafted items from the tiers below. It also means that a tinkerer’s inventory can be ‘very’ easily flooded with components that may or may not be useful, and so at the very least, it is worth holding onto the ‘useful’ component parts in mining bags & salvaging or selling items at Mulrok Trade Hall that are not needed.
Roughly speaking, if one were to divide tinkering items into tiers (where higher level tiers require items from lower level tiers), they would be as follows:
- Tier 1 – Wires, Gearsets
- Tier 2 – Widgets, Bow Strings, Alchemy Packs
- Tier 3 – Bow Pulley, Trinkets/Devices, Traps
Where possible, tinkerers should focus on making Tier 1 items to level up. However there are some instances where this is not possible, and the only available items that can be made for skill levelling are Tier 2 or even Tier 3 items (e.g. at 25/400 skill, Alchemy Packs & Fire Sticks are the only items available items that increase skill). The worst period for this is from 270/400 to 310/400, when the only non-recipe crafted tinkering items available that increase skill level, are Traps. Woohoo!
To prevent a tinkerer’s inventory from being overloaded with junk: Metals should be worked with ONE AT A TIME and mined in large quantities (say 4 deposits mined into 30+ mining bags with an extra trip later if needed). Aside from Fire/Electrical Alchemy packs and Silver Widgets/Wires, ALL items of a particular metal type (wires, widgets, etc.) should be salvaged or sold off at Mulrok Trade Hall (see Chapter 4.8, either at the Tinkering Merchant or Crafting Supplies merchant), before then moving on to the next metal. Copper is the starting metal, and can be purchased from the Tinkering merchant if required for additional items such as Alchemy packs (and so Copper doesn’t need to be stored in inventory). After working through Copper items/Devices/Alchemy Packs:
- 70/400 skill = the transition point to Bronze,
- 120/400 = Iron,
- 175/400 = Silver (Hold onto excess Silver, it’ll be needed soon!)
- 235/400 = Gold,
- 270/310 = ‘The Traps-Only Stage’. Silver Widgets/Wires are needed first for Tangle traps, then from 280ish-310, Gold Widgets/Wires + Fire/Electrical Alchemy packs are required. See Chapter 6.2 for Badger gathering tips.
- 310 onwards: Mithral Wire. The chance of successfully making Mithral Wire is ‘very’ low to start with, but eventually tinkerers will begin to see results. Autoclickers work wonders! (see Chapter 4.5)
10.2 Tinkering Recipes
All items in Tinkering are crafted at the Tinkering Toolset with a Tinkering Tool equipped. There are no exceptional tinkered items.
Widgets:
- 1 Widget: 2 Wire, 1 Gearset, 4 Ingots. (11 Ingots Total)
- Compound Bow Pulley: 2 Iron Widgets, 1 Iron Wire.
Wire/Gears:
- 1 Wire: 2 Ingots
- 1 Gearset: 3 Ingots
- Iron Bow String: 5 Iron Wire, 1 Iron Gearset
- Silver Bow String: 5 Silver Wire, 1 Silver Gearset
- Mithral Bow String: 5 Mithral Wire, 1 Silver Gearset
Alchemy Mixes:
- 1 Alchemy Pack: 1 Cured Small Leather Hide, 1 Copper Wire, 1 Essence (bought from tinkering merchant).
Trinkets and Devices:
- Gnomish Fire Stick. Base Item: Miscellaneous Device. Special Properties: 50 Charges Total, Use Burning Hands (2) 5 Charges/Use. Ingredients: 2 Copper Wire, 1 Flaming Alchemy Pack.
- Tinkered Mining Helmet. Base Item: Helmet. Special Properties: 45 Charges Total, Concentration +1, Use Light (5) 3 Charges/Use. Ingredients: 1 Crafted Copper Helm, 2 Copper Wire, 1 Electrical Alchemy Pack.
- Gnomish Stun Rod. Base Item: Miscellaneous Device. Special Properties: 50 Charges Total, Use Hold Person (3) 5 Charges Total. Ingredients: 1 Copper Widget, 2 Copper Wire, 1 Electrical Alchemy Pack.
- Tinkered Cloaking Device. Base Item: Miscellaneous Device. Special Properties: 48 Charges Total, Use Invisibility (3) 3 Charges/Use. Ingredients: 1 Shadow ORE (not ingot), 2 Bronze Widgets, 1 Electrical Alchemy Pack, 2 Bronze Wires.
- Gnomish Rocket Boots. Base Item: Boots. Special Properties: 45 Charges Total, Saving Throws vs. Reflex +2, Use Haste (5) 3 Charges/Use. Ingredients: 1 Hard Leather Boots, 2 Bronze Widgets, 2 Bronze Wires, 2 Flaming Alchemy Packs.
- Gnomish Acid Blaster. Base Item: Light Crossbow. Special Properties: 50 Charges Total, Attack Bonus +2, Use Melf’s Acid Arrow (3) 2 Charges/Use. Ingredients: 1 Standard Light Crossbow, 4 iron widgets, 4 iron wires, 4 acid alchemy packs.
- Gnomish Fire Pipe. Base Item: Miscellaneous Device. Special Properties: 50 Charges Total, Use Fireball (10) 5 Charges/Use, Use Flame Arrow (5) 1 Charge/Use, Use Flame Lash (10) 3 Charges/Use. Ingredients: 3 bronze widgets, 3 Bronze Wires, 3 Flaming Alchemy Packs.
- Gnomish Ice Net. Base Item: Miscellaneous Device. Special Properties: 50 Charges Total, Use Hold Animal (3) 1 Charge/Use, Use Hold Monster (7) 2 Charges/Use, Use Hold Person (3) 1 Charge/Use. Ingredients: 4 Iron widgets, 4 iron wire, 4 Frozen Alchemy packs.
- Gnomish Lightning Gun. Base item: Light Crossbow. Special Properties: 50 Charges Total, Attack Bonus +3, Light 20m (blue), Use Lightning Bolt (5) 2 Charges/Use. Ingredients: 4 silver widget, 4 silver wire, 1 Standard Light Crossbow, 8 Electrical Packs.
- Gnomish Crafted Helper. Base Item: Miscellaneous Device. Special Properties: Summon Helper, Single Use. Ingredients: 6 bronze widgets, 10 bronze wires, 6 electrical alchemy packs. The device disappears after one use, and the Helper is a level 6 gnome, with 9 AB, 19 AC and 56hp. The author recommends you should not bother crafting this item, unless you REALLY need help taking out those ferocious sewer rats, or you are hopelessly lonely and need a mute, excrement-coloured gnome (not joking) to fill the gap that your imaginary friend fails to fill.
- Gnomish Crafted Automaton. Base Item: Miscellaneous Device. Special Properties: Summon Automaton (Single Use). Ingredients: 8 gold widgets, 20 gold wires, 8 Electrical Alchemy Packs, 6 Flaming Alchemy Packs. The device disappears after one use, and the Automaton is a level 10 construct, with 13 AB, 20 AC and 200hp. On top of this, it actually has 2 attacks per round! The author recommends you should not bother crafting this item, unless you suffer from bouts of Robophilia, or have a handful of days to live.
- Clock of Ages. Base Item: Miscellaneous Device. Special Properties: Use Bigby’s Grasping Hand (17) 2 Uses / Day, Use Flesh to Stone (5) 2 Uses / Day, Use Slow (5) 5 Uses / Day, Use Time Stop (17) 2 Uses / Day. Ingredients: 8 gold widgets, 8 gold wires, 4 flaming alchemy packs, 4 acid alchemy packs, 4 cold alchemy packs, 4 electrical alchemy packs, 2 rage spider web spinners. Maximum Crafting Rating: Dark Blue. The first main attraction of Tinkering, Clock of Ages can allow characters of all levels to disable opponents in creative ways, and characters can hold as many Clocks as they like. As Ragon once put it: ‘That’s right, it never goes green.’
- Personal Locator Beacon. Base Item: Miscellaneous Device. Special Properties: Use Special Power 1/day (places a character-specific Locator Beacon). Ingredients: 8 gold widgets, 8 gold wires, 4 flaming alchemy packs, 4 acid alchemy packs, 4 cold alchemy packs, 4 electrical alchemy packs, 2 Quartz Crystals. Maximum Crafting Rating: Dark Blue. The second main attraction of Tinkering, the Personal Locator Beacon allows the user to set a ‘mark’ or Locator Beacon, that can be teleported back to via a Temple Portal. Very handy for crafters who would like to port back to either an ingredient gathering area or a workshop in a hurry, and combines very well with the Wings amulet! (see Chapter 14)
Traps:
- Weak Spike Trap. Ingredients: 2 Copper Widget, 1 Copper Wire.
- Weak Tangle Trap. Ingredients: 2 Copper Widget, 1 Copper Wire.
- Weak Fire Trap. Ingredients: 2 Bronze Widget, 1 Bronze Wire, 1 Flaming Alchemy Pack.
- Weak Shocking Trap. Ingredients: 2 Bronze Widget, 1 Bronze Wire, 1 Electrical Alchemy Pack.
- Weak Acid Trap. Ingredients: 2 Bronze Widget, 1 Bronze Wire, 1 Acid Alchemy Pack.
- Weak Shocking (IS IN FACT FROST) Trap. Ingredients: 2 Bronze Widget, 1 Bronze Wire, 1 Frozen Alchemy Pack.
- Medium Spike Trap. Ingredients: 2 Iron Widget, 1 Iron Wire.
- Medium Tangle Trap. Ingredients: 2 Iron Widget, 1 Iron Wire.
- Medium Fire Trap. Ingredients: 2 Iron Widget, 1 Iron Wire, 1 Flaming Alchemy Pack.
- Medium Shocking Trap. Ingredients: 2 Iron Widget, 1 Iron Wire, 1 Electrical Alchemy Pack.
- Medium Acid Trap. Ingredients: 2 Iron Widget, 1 Iron Wire, 1 Acid Alchemy Pack.
- Medium Frost Trap. Ingredients: 2 Iron Widget, 1 Iron Wire, 1 Frozen Alchemy Pack.
- Strong Spike Trap. Ingredients: 2 Silver Widget, 1 Silver Wire.
- Strong Tangle Trap. Ingredients: 2 Silver Widget, 1 Silver Wire.
- Strong Fire Trap. Ingredients: 2 Gold Widget, 1 Gold Wire, 1 Flaming Alchemy Pack.
- Strong Shocking Trap. Ingredients: 2 Gold Widget, 1 Gold Wire, 1 Electrical Alchemy Pack.
- Strong Acid Trap. Ingredients: 2 Gold Widget, 1 Gold Wire, 1 Acid Alchemy Pack.
- Strong Frost Trap. Ingredients: 2 Gold Widget, 1 Gold Wire, 1 Frozen Alchemy Pack.
Chapter 11: Bowyering
11.1 Bowyering Introduction, Item Management + Skill Levelling Tips
Bowyering is a primary craft concerned with making Bows and Crossbows from Wood (chopped from trees using a Woodsman’s Axe) & other materials, at a Bowyer’s Rack using Paring Knives. Oak, Elm and Ash trees are typically found in starting crafter areas close to crafting stations, whilst Yew trees are found slightly out of town & require fighting ‘teen level enemies’ in order to reach. Ironwood meanwhile can only be found in certain deposits. See Chapter 3.5 for more info on Wood locations.
When gathering wood, the longer time spent chopping a tree, the more individual staves a crafter will gain. When a tree is finally chopped down, there’s a percentage chance for the crafter to collect a bunch of 5 short staves from the tree. Staves of wood are small and easy to store in bags, meaning that a crafter can harvest wood for long periods without worrying about flooding their inventory.
Oak, Elm and Ash trees respawn quickly (less than a minute), so chopping these trees with a high Strength character (e.g. a ‘Master Crafter’ type character from Chapter 2.5) is usually more efficient, as overall they gain more bunches of 5 short staves (as opposed to individual staves). However, Yew trees have more HP than other trees, are fewer in number, and take a lot longer to respawn (around 5 minutes). Thus, a low Strength character (see Chapter 2.5 for more info) is better for chopping wood from Yew trees, as they spend longer hitting the same tree (thanks to the increased tree HP) and gain more staves overall than a strength character could ever manage. They also spend less time waiting around for Yew trees to respawn. Yew trees tend to be a little out of the way (see Chapter 3.5), so it is worth levelling up a ‘Yew collector’ a bit to deal with critters, and have plenty of bags in inventory to store as much Yew as possible in one trip.
Given that Short Staves are easier to acquire than long staves for Oak/Elm/Ash, it is best to focus on making Short Bows when leveling to start (with the odd Long Bow thrown in). This begins with Oak Staves + Hemp Cord for Rough Oak Hemp Shortbows, and works up from there. Given that Staves do not take up much inventory space, it is worth spending a decent amount of time running around collecting a particular wood type & placing wood into bags, before then returning to a crafting station to use it all.
Oak/Elm/Ash Shortbows of the Rough/Smooth Hemp/Silk varieties, are enough to increase Bowyering up to 135/400. After that, Compound Bows of the Oak/Elm/Ash varieties are enough to level Bowyering skill up to 200 (and a little bit beyond 200 making Longbows). At this point, Yew is required to level the rest of the way in Bowyering, and so it is worth making use of a Yew Collector type character (see Chapter 2.5) to spend a decent amount of time collecting Yew, before carting it back to a container for a crafter to use. Standard & Compound Yew bows are enough to level Bowyering to 399/400, whereafter crafting either of the most difficult 2 bows is required to level up the final point of Bowyering to 400 (i.e. Demon Bane Shortbow or High Elven Court Battle Bow). Given that both of these bows will not have a 100% chance of being crafted, it is worth collecting materials for multiple bows before attempting this. Good luck!
Whilst harvesting wood does not take up much inventory space, crafting Shortbows & Longbows does, and so they should be placed into empty mining bags or similar as they are being crafted. Bows sell for a little bit of money at Mulrok Trade Hall (see Chapter 4.8), and so it is worth making multiple trips to the Trade Hall whilst levelling Bowyering as bags start to get full of bows. They tend not to sell as much as items from other crafts, but selling them is certainly a better alternative to ‘throwing them in the bin’. Demon Bane + High Elven bows sell for a decent sum of money, though they require substantially more difficult-to-obtain ingredients (e.g. several Ideal Gems), and so are not viable ‘mass production’ items.
11.2 Bowyering Recipes
All bowyering equipment (besides Wood and metal Bowstrings) can be purchased from the Master Fletcher NPC. This includes Waxed Leather Cords (crafted in Tanning) and Compound Bow Pulleys (crafted in Tinkering), but does not include Bow Strings (also crafted in Tinkering). Thus, it is worth levelling up Tinkering before attempting Bowyering in order to make all available bows.
Wood properties (vary very slightly for different bowstrings/rough or smoothness) include:
- Oak: Weight Reduction 80%
- Elm: +1 AB
- Ash: +2 AB
- Yew: +2 AB, Move Silently +3.
Composite bows come with +1 Mighty for Oak/Elm and +3 Mighty for Ash/Yew.
In general, a bow requires:
- A wooden stave (short staves for shortbows and light crossbows, long staves for longbows and heavy crossbows),
- A bow string (made of hemp, silk, waxed leather cord for compound bows, or crafted metal bow strings from Tinkering)
- A Pumice Stone ONLY IF it is a Smooth Bow,
- 2 Compound Bow Pulleys ONLY IF it is a Compound Bow.There is a small chance that non-recipe-item crafted Bows & Crossbows can be ‘Exceptional’ items (around 10%), which come with slightly boosted stats compared to ordinary Bows.
Typical Exceptional Bonuses (on top of the standard bonuses) for Bows include:
- +1 attack (so for e.g. a standard yew bow gives +2 ab, an exceptional gives +3 ab)
- +1 mighty (for compound bows)
- 1d6 Massive Criticals
- Weight Reduction
- Negative Effects Removed
There are also recipe bows which require other components. These are:
Shortbows:
- Bow of Flowers. Base Item: Shortbow. Special Properties: Attack Bonus +1, Weight Reduction 80%, Use Charm Person or Animal (3) 1 Use / Day, Use Cure Light Wounds (2) 1 Use / Day. Ingredients: 1 Smooth Elm Silk Shortbow, 2 Fairy Dust, 1 Flower – Marigold, 1 Flower – Petunia, 1 Flower – Tarragon, 1 Flower – Spearmint.
Crossbows:
- Chameleon Crossbow. Base Item: Light Crossbow. Special Properties: Attack Bonus +1, Hide +6, Weight Reduction 80%. Ingredients: 1 Light Smooth Oak Hemp Crossbow, 2 Dye – Olive, 2 Dye – Brown, 2 Dye – Aqua, 3 Skeleton Knuckles.
Special Bows:
- Mith-Baruk Hunter Crossbow. Base Item: Heavy Crossbow. Special Properties: Attacks Bonus vs. Dwarves +4, Attack Bonus +2, Mighty +3, Weight Reduction 80%. Ingredients: 1 Long Ash Stave, 1 iron bow string, 2 Bodak’s Teeth, 1 Pumice Stone, 10 Shadow Ingots. The best available crafted Crossbow in the game, though its stats are rather lacking even for a crafted item. Thankfully, there are some decent looted Crossbows on Victorian Nordock, as well as a decent Epic Crossbow available.
- Kai’leth’s Rage. Base Item: Longbow. Special Properties: Attack Bonus vs. Evil +4, Attack Bonus +2, Light 20m (White), Mighty +3, Use Clarity (3) 1 Use / Day, Weight Reduction 80%, Only Usable by Lawful Good. Ingredients: 1 Long Yew Stave, 1 Silver Bowstring, 8 silver ingots, 4 Dragon Blood.
- Shortbow of Dark and Distant Death. Base Item: Shortbow. Special Properties: Attack Bonus +2, Mighty +3, Move Silently +3, Massive Criticals 1d4, Use Darkness (3) 1 Use / Day, Use Silence (3) 1 Use / Day. Ingredients: 1 Short Yew Stave, 1 Iron Bow String, 1 Darkness Scroll, 1 Silence Scroll, 4 Dragon Blood, 2 Compound Bow Pulley.
- Whispering Wind. Base Item: Longbow. Special Properties: Attack Bonus +2, Mighty +3, Massive Critical 1d8, Hide +3, Move Silently +3, Use Haste (5) 1 Use / Day. Ingredients: 1 Long Yew Stave, 1 Silver Bowstring, 2 Fairy Dust, 1 Scroll of Haste, 4 Will’o’Wisp Essences, 8 Silver Ingots.
- Demon Bane Shortbow. Base Item: Shortbow. Special Properties: Attack Bonus +5, Strength +2, Massive Criticals 1d6, Mighty +5, Immunity to Disease. Ingredients: 2 Short Yew Staves, 2 Plague Demon Horns, 1 Mithral Bowstring, 4 Ideal Emeralds, 8 Dragon Blood, 8 Mithral Ingots. Maximum Crafting Rating: Dark Blue. The best available crafted Shortbow in the game, and also the ‘easier’ item to make if Bowyering is 399.
- High-Elven Court Bow. Base Item: Longbow. Special Properties: Attack Bonus +5, Constitution +2, Mighty +5, Discipline +5, Massive Criticals 2d6. Ingredients: 2 Long Yew Staves, 2 Ironwood, 10 Adamantine Ingots, 1 Mithral Bow String, 2 Compound Bow Pulleys, 10 Dragon Blood, 4 Ideal Rubies. Maximum Crafting Rating: Red. The best available crafted Longbow in the game, which can also be upgraded to Mighty +10 using Maggris Silk Cord (see Chapter 13.3). This is also the only crafted item that’s non-drop (as it is of Epic quality), and so a DM is required to transfer this item to another character.
Chapter 12: Fletching
12.1 Fletching Introduction, Item Management + Skill Levelling Tips
Lucky last, Fletching is the primary skill concerned with crafting arrows & bolts using various materials. Many materials (such as essences) can be bought from the Fletching merchant, and arrows themselves do not sell at Mulrok Trade Hall, making Fletching the most expensive craft that a crafter can undertake (hence why Fletching is left until last, as it is assumed by this point that a ‘master crafter’ has enough money to work their way through it).
However! The trade off for being the most expensive craft, is that Fletching is arguably the easiest craft to level (as just about all fletching materials can be purchased directly from the fletching merchant in batches of 10) and also offers a very wide range of magical arrows and bolts, some of which are amongst the most powerful items available in Victorian Nordock. A quiver full of several types of crafted magical ammunition grants skilled archers an edge over their melee counterparts, allowing them to select specialised equipment for particular enemies & swiftly disable them and/or take them out. In a world where Devastating Critical leaves archers at a disadvantage compared to their ‘high crit range’ melee counterparts, Fletching offers a unique ‘inspector gadget’ playstyle for archers, who can consult their oversized quiver & utilise the appropriate tool for a given situation.
Arrows/Bolts crafted in batches of 20, and don’t require much inventory management while crafting. That said, ammunition will eventually build up in a crafter’s inventory, so it can be worth either offloading spare crafted arrows to a Mule character (in the event that a future archer might wish to use them), or tossing them in a Trash receptacle (as they don’t currently sell at Mulrok Trade Hall). It is definitely recommended to save arrows from the ‘Greater Elemental’ stage onwards, as these typically require rare ingredients or scrolls.
Leveling up Fletching mainly involves buying materials from the Fletching merchant & converting them to arrows/bolts at a Fletching Desk, with some additional materials/items required at higher ranks. Up to 160/400 can be levelled using merchant materials alone, whilst ‘Greater Arrows/Bolts’ onwards will require Mithral arrowheads (made in Weaponcrafting), in addition to merchant materials (typically Basic Arrow Shaft + Advanced Arrow Fletch + Essences). From 260/400 onwards, Fletching effectively branches off into 2 item streams: One requiring essences from creature parts, and another requiring scrolls.
To extract essences from creature parts, crafters will need to purchase Shadow Iron Fletching Tools from the merchant, and use these items on the appropriate animal part, which will allow them to extract 10 essences from it. Scrolls meanwhile can be purchased from various scroll merchants, including Garl Glittergold in Kabu Magic Shop, and Vrillow Hawk Master in the Desolate Wastelands Oasis Tent. In most cases: scrolls are easier to acquire than animal essences, but are also more expensive as they are bought from stores. For more information on ingredient/scroll locations, see Chapter 3.6.
12.2 Fletching Recipes
In general, one batch of arrows/bolts requires the following:
- A basic oak shaft (either bought from the merchant, or crafted from short oak staves),
- An arrow fletch (basic or advanced),
- An arrowhead (basic, hooked, bladed, advanced or mithral).Some ammunition batches will also require:
- One or more Elemental Essences (Acid/Cold/Electrical/Fire, bought from Fletching merchant),
- One or more Scrolls (typically bought from a scroll merchant),
- One or more ‘Creature Essences’ (extracted from appropriate animal parts).
All fletching components, bar mithral arrowheads + scrolls + creature essences, can be purchased from the Fletcher merchant. Advanced arrow fletches can be looted off some types of birds. Arrowheads can be crafted in Weaponcrafting (under ammunition), and advanced/mithral arrowheads are needed for arrows requiring elemental essences.
Arrows:
- Basic Crafted Arrow/Bolt: 1 Crafted Basic Arrow Head, 1 Basic Arrow Shaft, 1 Basic Arrow Fletch.
- Hooked Arrow/Bolt: 1 Crafted Hooked Arrow Head, 1 Basic Arrow Shaft, 1 Basic Arrow Fletch. Special Properties: Piercing 2 Damage.
- Bladed Arrow/Bolt: 1 Crafted Bladed Arrow Head, 1 Basic Arrow Shaft, 1 Basic Arrow Fletch. Special Properties: Slashing 2 Damage.
- Piercing Arrow/Bolt: 1 Crafted Bladed Arrow Head, 1 Basic Arrow Shaft, 1 Basic Arrow Fletch. Special Properties: Piercing 1d4 Damage.
- Flaming Arrow/Bolt: 1 Crafted Advanced Arrow Head, 1 Basic Arrow Shaft, 1 Advanced Arrow Fletch, 1 Essence of Fire. Special Properties: Fire 1d4 Damage.
- Electrical Arrow/Bolt: 1 Crafted Advanced Arrow Head, 1 Basic Arrow Shaft, 1 Advanced Arrow Fletch, 1 Essence of Electricity. Special Properties: Electrical 3 Damage.
- Acid Arrow/Bolt: 1 Crafted Advanced Arrow Head, 1 Basic Arrow Shaft, 1 Advanced Arrow Fletch, 1 Essence of Acid. Special Properties: Acid 1d6 Damage.
- Frozen Arrow/Bolt: 1 Crafted Advanced Arrow Head, 1 Basic Arrow Shaft, 1 Advanced Arrow Fletch, 1 Essence of Cold. Special Properties: Cold 1d6 Damage, Piercing 1 Damage.
- Greater Flaming Arrow/Bolt: 1 Crafted Mithral Arrow Head, 1 Basic Arrow Shaft, 1 Advanced Arrow Fletch, 1 Essence of Fire. Special Properties: Fire 1d8 Damage, Piercing 1 Damage.
- Greater Electrical Arrow/Bolt: 1 Crafted Mithral Arrow Head, 1 Basic Arrow Shaft, 1 Advanced Arrow Fletch, 1 Essence of Electricity. Special Properties: Electrical 1d8 Damage, Piercing 1 Damage.
- Greater Acid Arrow/Bolt: 1 Crafted Mithral Arrow Head, 1 Basic Arrow Shaft, 1 Advanced Arrow Fletch, 1 Essence of Acid. Special Properties: Acid 1d8 Damage, Piercing 1 Damage.
- Greater Frozen Arrow/Bolt: 1 Crafted Mithral Arrow Head, 1 Basic Arrow Shaft, 1 Advanced Arrow Fletch, 1 Essence of Electricity. Special Properties: Cold 1d8 Damage, Piercing 1 Damage.
- Greater Elemental Arrow/Bolt (the previous ‘top damage ammunition’ prior to Mike’s 2025 overhaul): 1 Crafted Mithral Arrow Head, 1 Basic Arrow Shaft, 1 Advanced Arrow Fletch, 1 Essence of Fire, 1 Essence of Electricity, 1 Essence of Acid, 1 Essence of Cold. Special Properties: Acid 4 Damage, Cold 4 Damage, Electrical 4 Damage, Fire 4 Damage, Sonic 4 Damage.
- Mind Shifters. 1 Mithral Arrow Head, 1 Basic Arrow Shaft, 1 Fairy Dust, 1 Advanced Arrow Fletch, 1 Essence of Fire. Special Properties: Fire Damage 1d4, On Hit Confusion DC-18 25% / 3 Rounds.
- Arrow/Bolt of Animal Slaying: 1 Crafted Mithral Arrow Head, 1 Basic Arrow Shaft, 1 Advanced Arrow Fletch, 1 Essence of Fire, 1 Fire Beetle Extract (from Fire Beetle’s Belly). Special Properties: Damage Bonus vs. Animals 1d6 Fire, On Hit Slay Animal DC-14.
- Arrow/Bolt of Blinding: 1 Crafted Mithral Arrow Head, 1 Basic Arrow Shaft, 1 Advanced Arrow Fletch, 1 Essence of Fire, 1 Scroll of Blindness/Deafness. Special Properties: Fire Damage 1d6, On Hit Blindness DC-20 50% / 2 Rounds.
- Arrow/Bolt of Elemental Slaying: 1 Crafted Mithral Arrow Head, 1 Basic Arrow Shaft, 1 Advanced Arrow Fletch, 1 Essence of Electricity, 1 Wisp Extract (from Will o Wisp Essence). Special Properties: Damage Bonus vs. Elementals 1d6 Electrical, On Hit Slay Elemental DC-14.
- Arrow/Bolt of Stunning: 1 Crafted Mithral Arrow Head, 1 Basic Arrow Shaft, 1 Advanced Arrow Fletch, 1 Essence of Fire, 1 Scroll of Power Word Stun. Special Properties: Electrical Damage 1d6, On Hit Stun DC-20 50% / 2 Rounds.
- Arrow/Bolt of Construct Slaying: 1 Crafted Mithral Arrow Head, 1 Basic Arrow Shaft, 1 Advanced Arrow Fletch, 1 Essence of Acid, 1 Spider Extract (from Rage Spider Web Spinners). Special Properties: Damage Bonus vs. Constructs 1d6 Acid, On Hit Slay Construct DC-14.
- Arrow/Bolt of Paralysation: 1 Crafted Mithral Arrow Head, 1 Basic Arrow Shaft, 1 Advanced Arrow Fletch, 1 Essence of Acid, 1 Scroll of Hold Monster. Special Properties: Acid Damage 1d6, On Hit Hold DC-20 50% / 2 Rounds.
- Arrow/Bolt of Ice Storm: 1 Crafted Mithral Arrow Head, 1 Basic Arrow Shaft, 1 Advanced Arrow Fletch, 1 Essence of Cold, 1 Scroll of Ice Storm. Special Properties: Cold Damage 1d6, On Hit Ice Storm Level 15.
- Arrow/Bolt of Freezing: 1 Crafted Mithral Arrow Head, 1 Basic Arrow Shaft, 1 Advanced Arrow Fletch, 1 Essence of Cold, 1 Scroll of Cone of Cold. Special Properties: Cold Damage 1d6, On Hit Freeze (Slow) Level 15 (DC = 10 + caster level = DC-25).
- Arrow/Bolt of Undead Slaying: 1 Crafted Mithral Arrow Head, 1 Basic Arrow Shaft, 1 Advanced Arrow Fletch, 1 Essence of Divinity, 1 Bone Dust Extract (from Skeleton Knuckles). Special Properties: Damage Bonus vs. Undead 1d6 Divine, On Hit Slay Undead DC-14.
- Arrow/Bolt of Fear: 1 Crafted Mithral Arrow Head, 1 Basic Arrow Shaft, 1 Advanced Arrow Fletch, 1 Essence of Divinity, 1 Scroll of Fear. Special Properties: Divine Damage 1d6, On Hit Fear DC-20 50% / 2 Rounds.
- Arrow/Bolt of Dragon Slaying: 1 Crafted Mithral Arrow Head, 1 Basic Arrow Shaft, 1 Advanced Arrow Fletch, 1 Essence of Acid, 1 Essence of Cold, 1 Essence of Electricity, 1 Essence of Fire, 1 Dragon Extract (from Dragon Blood). Special Properties: Damage Bonus vs. Dragons 1d6 Acid, Damage Bonus vs. Dragons 1d6 Cold, Damage Bonus vs. Dragons 1d6 Electrical, Damage Bonus vs. Dragons 1d6 Fire, On Hit Slay Dragon DC-14.
- Arrow/Bolt of Knockdown: 1 Crafted Mithral Arrow Head, 1 Basic Arrow Shaft, 1 Advanced Arrow Fletch, 1 Essence of Fire, 1 Scroll of Balagorn’s Iron Horn, 1 Scroll of Bigby’s Forceful Hand. Special Properties: On Hit Bigby’s Forceful Hand Level 15.
- Arrow/Bolt of Arithon (the new ‘top damage ammunition’): 1 Crafted Mithral Arrow Head, 1 Basic Arrow Shaft, 1 Advanced Arrow Fletch, 1 Essence of Fire, 1 Essence of Electricity, 1 Essence of Acid, 1 Essence of Cold, 1 Essence of Divinity. Special Properties: Acid Damage 1d6, Cold Damage 1d6, Divine Damage 1d6, Electrical Damage 1d6, Fire Damage 1d6, Sonic Damage 1d6.
- Arrow/Bolt of Petrification: 1 Crafted Mithral Arrow Head, 1 Basic Arrow Shaft, 1 Advanced Arrow Fletch, 1 Scroll of Stoneskin, 1 Scroll of Flesh to Stone (only available from the Nine Hells shop!). Special Properties: On Hit Flesh to Stone Level 15.
Chapter 13: Deity/Weekend Quests & Epic/Uber Smith Items
Finally, some information on two facets of Victorian Nordock that are ‘related’ to crafting, but do not use the ATS system directly: Deity Quest + Epic/Uber Smith items, and the Wings Quest.
13.1 Deity Quest Item Intro
Victorian Nordock has an extensive Deity Quest system, which grants levelled quests & rewards from various Temple Altars. Some of the Level 36-40 quests contain unique rewards which can be used to ‘power up’ certain items, so long as they have at least: 1 AC, 1 AB or 1 Enhancement. This means that items such as Death Magic Immunity Belts, NORMAL Crafted Ability Increase Jewellery, Golden Circlets, Mantles of Necromancy etc. cannot be enhanced with Deity Quest items, as they lack AC/AB/Enhancement. Meanwhile, just about all crafted weapons/armour items and Exceptional Jewellery (which grants +1 AC) ‘can’ be enhanced using these items. Of the items that can be upgraded, there are also some items more amenable to upgrades than others, and so it is worth examining this system in context with crafted items.
The main type of item within this ‘special upgrade’ system are Power Gems. There are 10 types in all: 1 Power Gem for each of the 9 non-physical damage types (Acid, Cold, Fire, Electrical, Sonic, Divine, Magical, Negative, Positive), and a Plain White Gem (simply labelled Power Gem). In addition to the 10 gems, there are also Troll King Tusks and Maggris Silk Cord.
Power Gems, Troll King Tusks & Maggris Silk Cord can be added to items using 2 specific NPC’s: The Epic Smith, and the Uber Smith. The Epic Smith is located in the same sector as the Epic Shop (accessed from Brosna Hall, Chaullsin Royal Quarter, and Duergar Hall of Council), in the top right corner. The Uber Smith is located within the treasure trove of a demon known as Nightmare. Accessing Nightmare’s Realm requires the player to hand both an Ancient Dagger of Light and an Ancient Dagger of Darkness (Quest Rewards for the Ancient Troll King and Old Lich King respectively, see 13.3), to 4 key NPC’s located around Cellanir. Each of these 4 NPC’s will exchange a Light + Dark dagger for a unique item, which are then all used to unlock 4 doors inside of Cellanir Temple, and gain access to Nightmare’s realm. Nightmare is a tough fight, so it is best to be prepared & travel in a group.
13.2 What is a ‘Weekend’?
White Power Gems are the staple reward for “Weekend Quests” … which as their name implies, only occur on Weekends. ‘Weekends’ are defined as: the very beginning of Sunday in New Zealand, i.e. 12:00AM Sunday New Zealand time or GMT +12 (10pm Saturday Sydney time), until 12AM Tuesday New Zealand time / GMT+12 (i.e. 48 hours later). This amounts to 2 complete server lifetimes, as the server is programmed to reset every 24 hours. The in-game clock can be used to see how far through a ‘server lifetime’ Victorian Nordock happens to be. 1 in-game ‘DnD hour’ equals 2 minutes, which means one in-game ‘DnD day’ is 24 x 2 = 48 minutes (or 0.8 ‘real hours’). Months are based off of Lunar Months, which are 28 days long. Victorian Nordock ‘begins’ at Month 6 Day 1 Hour 6, and ‘ends’ on Month 7 Day 3 Hour 7, which is about 30 in-game ‘days’ later (or 30 x 0.8 hours = 24 hours later).
Weekend Quests have an increased chance of being selected at an altar in any given week (1/10 chance, as opposed to 1/26) and rotate from week to week in a predictable order. Announcements for Weekend Quests are broadcast on Victorian Nordock’s Discord, Website, and Facebook group (which can be ‘read back through’ in order to predict when a particular quest will come up). White Power Gems are a guaranteed reward for Weekend quests, and level 36-40 quests also have a small chance of granting White Power Gems as random rewards at any time. One’s best bet then for acquiring White Power Gems is to do Weekend Quests, or to tag along with others who are completing Weekend Quests, as rewards for Deity Quests are shared.
13.3 Fixed Deity Quest Item Rewards
Whilst White Power Gems are largely weekend quest dependent, the rest of the Epic/Uber smith items (Elemental Gems, Tusks, Silk Cords) are tied to specific quests. These are:
- Plague Domain, South of Miner’s Rest (Acid),
- Zanamex, North of Benzor (Cold),
- Smaug, through Bleak Forest (Fire),
- Almighty Titan, deep into Gurnal Island (Electrical),
- The Gash Quest ie Agium and Ruah, located northwest of Trondor (Sonic),
- Planar Lands, through the Valley of Blight (Divine),
- Masterius the Lich King, northeast regions of No Man’s Land (Magical),
- Dracolich, in Kabu Penna Graveyard (Negative),
- Minotaur, 6th plane of the Nine Hells accessible from Kabu’s Tower of Ktos (Positive),
- Ancient Troll King, at the back of Troll Forest in Cellanir (Troll King Tusk + Ancient Dagger of Light),
- Old Lich King, at the back of Cellanir Lost Temple (Ancient Dagger of Darkness),
- Maggris the Hive Mother in the Ancient Ruins in Mulrok (Maggris Silk Cord).
13.4 Upgrading Items
To attach a Power Gem/Tusk/Cord to an item and upgrade it, ‘use’ the special power on the item to be upgraded, then talk to one of the two Smiths about enhancing said item. White Power Gems added to items will increase an item’s Enhancement, AC, or AB, depending on whatever existing property the item starts with. In the case of items with Enhancement Bonus (i.e. Melee Weapons) or Monk Gloves with AB, Elemental Power Gems added will increase that item’s Damage. If an item has either Attack Bonus or AC only (i.e. ‘not’ Enhancement, the exception being Monk Gloves), then Elemental Gems added to that item will instead increase Elemental Immunity by a certain percentage. Tusks meanwhile can grant Keen to melee weapons of any type (bludgeoning included), and Maggris Silk Cord can increase Mighty on bows.
For White Power Gems & Elemental Gems: each upgrade advances an item up one stage, and each subsequent upgrade will require progressively more gems. The Epic and Uber Smiths also have a limit on the amount of upgrades they can place on an item. Items upgraded past the Epic Smith limit become non-drop items (similar to Epic and Uber shop items), and so cannot be transferred to other characters.
For White Power Gems & Elemental Gems on weapons/monk gloves:
- +1 damage costs 1 gem,
- +1 to +2 Enhancement/AB/AC/damage costs 2 gems,
- +2 to +3 costs 3 gems,
- +3 to +4 costs 4 gems (Epic Smith limit),
- +4 to +5 costs 5 gems,
- +5 to +6 costs 6 gems (Uber Smith limit),
Weapons can hold up to +12 damage enhancement from gems, which crucially, STACKS WITH EXTRA PHYSICAL DAMAGE (but ‘not’ extra elemental damage), and also stacks with racial specific damage (though the same type won’t stack, e.g. 1d10 Fire vs Evil won’t stack with Fire Damage). This means that certain weapons that come with physical damage of a different type to the weapon’s base damage (e.g. Katana of the Dragons with its 5 Piercing Damage) make great upgrade targets for elemental gems. It is also economical to spread damage types out to save on gems. E.g. a weapon with 2 types of +6 damage costs 21 + 21 = 42 gems, whereas a weapon with 6 types of +2 damage costs 3 + 3 + 3 + 3 + 3 + 3 = 18 gems.
Similarly, it’s more efficient to enhance an item from +5 to +6 (say an Uber Ring with +5 AC), than it is to enhance an item from +1 to +6 (say an Exceptional Jewellery item with +1 AC). Some characters also make better use of AC upgrades than others (e.g. Dwarven Defenders barely make use of them, whilst Dex characters can indeed make use of them), so it’s worth being choosy when using Power Gems to increase AC.
For silly NWN coding reasons, 1d4 damage counts at 4 towards the damage cap, and 1d6 counts as 7 towards the cap. This means that it’s only possible to add 1 Elemental Damage point to, say, an Exceptional Verdicite melee weapon (1d6 Acid), even though the weapon overall will then deal less than 8 elemental damage. Thus, as mentioned earlier, weapons with extra physical damage types, or weapons with auxiliary benefits such as Keen, make for better Power Gem targets.
Once a Melee Weapon has +4 Elemental Damage of a particular type added to it, it begins to display a visual effect associated with that damage type. However! If other types of damage are added to that weapon, and THEN the weapon’s +4 Damage / Visual Creating effect is increased to +5 … THAT EFFECT DISAPPEARS. Thus, to ensure that a weapon has a particular elemental visual effect, it’s best to enhance it to a desired high value at the Uber Smith FIRST, and THEN add all the other elements. If a weapon starts with +3 Elemental Damage of a particular element, and no other element damage types on that weapon are above +3, then the same applies.
For Elemental Gems on items other than weapons/monk gloves:
- 5% damage immunity costs 1 gem,
- 5% to 10% immunity costs 2 gems (Epic Smith limit),
- 10% to 25% immunity costs 3 gems (Uber Smith limit).
Items can hold up to 2 types of immunity (e.g. Acid + Fire), and immunities stack with each other. This means that it is possible to become ‘actually’ immune to a certain damage type by wearing 4 items with 25% immunity on them. As fun as this sounds, 100% elemental damage immunity is never ‘really’ necessary. 50-75% Elemental immunity is often sufficient when combined with other Damage Resistance items (e.g. Elemental Resistance ring, with 15/- resistance to acid/cold/electrical/fire). Something to keep in mind when Gemming up a character to, say, fight monsters in the Nine Hells …
For other Smith items:
- 4 Troll King Tusks are required to add Keen to any melee weapon (at either Smith),
- 1 Maggris Silk Cord is required to upgrade the Mighty of a Ranged Weapon by +1, regardless of the weapon’s previous Mighty value (so +1 to +5 Mighty takes 4 cords and not 14). The Epic Smith can upgrade Mighty to +4 maximum (similar to Power Gems), whilst the Uber Smith can upgrade Mighty well beyond this, depending on the weapon type. All ranged weapons max out at Mighty +5 except for two: The High Elven Court Battle Bow (which can be upgraded from +5 to +10), and the Uber Longbow (which can be upgraded from +10 to +20).
13.5 Preferable Items to Upgrade
Given all the above, here is a list of crafted items that make for decent gem upgrade targets given their starting stat profile:
- White Priest Robes and Yellow Wizard’s Robe, which both start at +2, can be worth increasing to +4 for a little extra AC on starting characters that could use them.
- Exceptional Mithral Full Plate (+4 AC) can be worth upgrading to +6 AC on ‘AC-focused’ strength based characters (e.g. Bard/RDD’s).
- Exceptional Crafted Amulets (+1 AC) can be worth upgrading to +6 AC in niche circumstances where a character would prefer an ability boost of some description, to Chain of Mind (see below),
- Capricious Blade (+3 Enhance, On Hit Stun DC-22 50%/3 rounds). This Dagger can be enhanced to +4, given 8 elemental damage (8 types dealing 1 damage each only costs 8 gems), and Keen. Thereafter it becomes a formidable ‘starting character weapon’ that anybody (even mages) can use right from level 1.
- Biting Bastard Blade (+3 Enhance, Piercing 1d4 Damage, Fire 1d6 Damage vs. Undead, Keen). This can be made into the highest damaging Bastard Sword in the game if given enough ‘non-Fire’ gems, particularly against Undead.
- The Screaming Cleaver (Enhancement Bonus +4, Keen, Massive Criticals 1d10, Attack Bonus vs. Undead +5, Damage Bonus vs. Undead 1d10 Sonic). This can be made into the highest damaging Kukri in the game vs Undead if given ‘non Sonic’ gems.
- Katana of the Dragons (Enhancement Bonus +4, Piercing 5 Damage, Keen, Discipline +9). The best crafted weapon to grant elemental gems to, given that they stack with the 5 piercing damage for a potential total of +17 extra weapon damage with maxed elemental gems.
- The High Elven Court Battle Bow is the only bow that can use crafted ammunition (i.e. isn’t unlimited ammo) that can have Mighty upgrades beyond +5, up to +10.
And then for ‘non-crafted’ items:
- Uber Robes/Armour/Rings/Helmet can sometimes be decent targets to increase AC to +6,
- Chain of Mind (+5 AC, immunity to Mind Spells) is often the ‘best in slot’ item for melee characters, and can easily be upgraded to +6 AC for those that would like the AC boost,
- The Courtier’s Blade Rapier comes with 2d4 extra slashing damage, which when combined with a Rapier’s crit rate, makes it arguably the most desirable weapon to add Elemental Gems to (even more so than Katana of the Dragons!),
- Uber Weapons are an obvious Elemental Gem target in the event that a crafted/epic weapon isn’t being used,
- The Uber Bow can be upgraded up to +20 Mighty, so that the ‘RDD Dev Archers’ of the world can finally put all that extra Strength to use,
- Any item with at least +1 AC can have Elemental Immunity added to it. This includes the Hotenow set (ring/ring/gloves), which is obtained by completing the ‘Karrundax’ quest 3 times (bring friends & plenty of heal potions!), and comes with tremendous synergy bonuses (in total: +9 regen, +6 boosts to all six abilities, 15/- elemental resistance to acid/cold/electrical/fire/sonic, immunity to level/ability drain). Thus why Exceptional Rings are NOT suggested on this list!
Chapter 14: The Wings Quest
Pendant of the Golden Wing, as alluded to throughout the guide, is a highly sought after item that requires crafted items to obtain. Mining, Smithing, Gemcutting, Tanning, Weaponcrafting, and Armourcrafting, all effectively need to be maxed (or nearly maxed) in order to create items for the Wings Quest.
Here is a rundown on how/where to collect the 4 items for the Wings Quest, which are: Drow Priestess Head, Blessed Token of Possession, Braveheart, and Brock’s Dagger of Mithral. Two of these items are found in-game, and the other two need to be crafted.
14.1 Looted Wings Quest Items
First there is the Drow Priestess Head. This is picked up off the Drow High Priestess in the East Deep Caverns, outside of the western Loknar gate and underneath Sholo (two sectors east of Gloomy Dark, one sector east of Underdark Deep Caverns). ONCE PER RESET ONLY.
The next item required is the Blessed Token of Possession. This is acquired in several steps:
- Go to Tobaro Sewers (not too far from the boat) and keep heading right down the bottom to a bunch of Drow near a chest. Inside the chest is a book labelled the Treatise of Summoning. ONCE PER RESET ONLY.
- Head to Brosna and give the book to Werdna, in the Brosna Magic Shop (southeast corner of Brosna). After a bit of chatter he will grant the Ruby Key, which opens Sholo Crypt.
- Head through Sholo Crypt. Right down the bottom of the crypt, through a portal on the Isle of Doom, there is a vampire named Lord Nestor. Kill him, and he will have a standard token of possession on him. Pick it up and head out. ONCE PER RESET ONLY.
- Take the standard Token of Possession to Galdor and he will bless it!
14.2 Crafted Wings Quest Items
The third item required is the Braveheart Armour. This is crafted in armour crafting using rubicite ingots (see Chapter 8.2), ancient red dragon hearts (see Chapter 3.6) and a crafted studded leather armour from the blacksmithing merchant. For more info on the stats of the armour itself, see Chapter 8.2.
Finally there is the Brock’s Dagger of Mithral. Made in weaponcrafting, this is the most difficult item to attain out of the 4, as it effectively requires several components (final ‘Brock Dagger’ components in bold). These are:
- Charm of Drake Passage (Armour Crafting + Gemcutting, see Chapter 8.2 for more info). Required to obtain a key off of Renal the Dragon in the Bharat Duergar Lair (northeast side of Underdark Deep Caverns, one sector west of the Drow High Priestess), which opens the Bharat Duergar Vault containing Blackberry Gems.
- Blackened Treated Leather Pouch (Tanning, see Chapter 6.3 for more info). This is required to make the Oil of Vukas (from Percy) in combination with 10 Blackberry Gems.
- Will o Wisp Essences (see Chapter 3.6),
- Scroll of Daze (see Chapter 3.6),
- Mithral Ingots (see Chapter 3.2).
For more info on the stats of the dagger itself, see Chapter 7.2.
14.3 Fighting Blackavar
Blackavar is located inside the Tower of Inodrio on Misty Isle, which can be reached by boat from Benzor for surfacers, Loknar for Drow, and Gracklstugh Docks for Duergar.
The Misty Isle Dragons, most of Blackavar’s minions, and Blackavar himself, have Fear auras, so Fear/Mind immunity is worth equipping throughout. Wizards and sorcerers can also cast Mind Blank on party members to shield them from Fear. Head north from the boat several sectors until the Tower is reached. All sectors ahead of the Blue Dragon Pass cannot be ported to via party portal.
Once near the Tower, follow the snaking path, down the cliff face and along a sandy pathway, towards the base of the tower. Manually rotating the camera is a good idea as this section can be difficult to navigate. Head inside and up through the basement levels of the tower. The main basement level contains a labyrinth of tunnels. In the southwest corner of this map, there should be a Gong. Click on the gong. A helmed horror called ‘The Riddler’ will appear, requesting all the quest items EXCEPT THE TOKEN (which is used later). In exchange, the Riddler grants a key to the 1st floor.
After the key has been retrieved, head through the ‘tunnel passages’ on the side walls (ie ‘not tunnels that have just been exited’), which will eventually lead to the bottom of the map. The chance of arriving at the bottom of this map is completely random, but is guaranteed after a certain number of tries. The legacy of Shai’s ‘pseudo party cohesion bit’ lives on.
Once down the southern end of the basement, use the Riddler’s key to open the door, and head up the ladder. The first floor is split into two halves, joined by a secret door. Smash through the spider webs and head north. Once at the northern end of the first half of the map, activate detect mode and repeatedly run back and forth through the entrance to what looks like the most north eastern (top right) empty cell, and a secret door will appear. Head through it. The door will disappear after 20 seconds because ‘people in NWN have secret door amnesia’, so the detect wiggle might have to be repeated multiple times through the entrance of the cell doorway to spot the door and wave a big party through it. Again, pseudo party cohesion is cool.
Once through this door, head south. It is around this time that high level enemies (e.g. Death Squad Archers) begin to appear if the Wings party contains level 40’s, so it’s worth having them lead from the front. Eventually a fork with two paths will appear: The ‘right hand’ fork will lead to the basement, and the ‘left hand fork’ will lead to the 2nd level. The 2nd level will be locked, and requires a key from the basement, so head there first.
Head right at the fork, through a portal guarded by stone gargoyles, back down to another area of the basement level, to attain a key. A large hole in the cavern floor will appear, with an island of land in the middle. Walk around the hole in the floor until a sparkling barrier and a pillar is reached. Click on the pillar (will require the Blessed Token of Possession in inventory for this to work), and a stone bridge will appear. Kill the sparking barrier, head across the bridge, and slay the Keymaster. As his name implies, he has a key!
Head upstairs to the left hand fork, and proceed to the 2nd level. After the 2nd level (which has lots of golems on a chessboard, fun to smite), there’s a 3rd level, then Blackavar’s main chamber. The chamber is accessed by giving the spirit of Merlin a looted book off of his corpse, which will port all party members level 15 and over into his chamber. It is worth resting & buffing up before attempting this final fight.
Blackavar is a fairly high level spellcaster, with a lot of spellcaster minions with Fear auras, as well as Greater Warrior Mummies with Death Magic auras. Thus, Fear/Mind + Death Magic immunity items/spells are highly recommended. Clerics and Druids can cast Death Ward on party members to shield them from the mummy’s death auras, and Wizards and Sorcerers can cast Mind Blank to shield party members from fear.
Once inside, melee characters can use knockdown on just about everything, as the discipline of the spellcasters (and Blackavar) is rather low, and a knocked down target can’t fire spell barrages. Once Blackavar is down, he has a key to open his summoning room. Remember to loot it from him before his corpse disappears!
Outside the tower, there should be a pillar. USE the Blessed Token of Possession on the Pillar, and this will lead to Galdor. Talk to Galdor, obtain the Pendant of the Golden Wing, then before flying out, take a screenshot of your merry band & post it in the Events channel on Discord! =)
Conclusion & Thanks
Well, dear reader, here we are at the end. If you’ve made it this far, hopefully you’ve learnt something!
I certainly didn’t find everything in this guide out on my own, and thus I have people to thank for their help. To Warwp for bits and pieces of item and recipe information, as well as Masao and Qlurzach for pointing out recipe typos. Also a HUGE thanks to Ragon and Seeker/Aowen (wherever you both are!) for their seemingly infinite crafting knowledge way back in 2009/2010, and the patience to withstand my million questions.
And of course, a big thanks to Mike for taking the time to add all of the new Tailoring/Fletching items that inspired writing v2.0 in the first place, and to Arithon for keeping this place going quietly from behind the scenes, offering advice on how several of the systems work, and being open to my (constant and probably annoying) feedback . Re-writing a 15 year old guide for a 2002 video game has certainly been an experience that I never thought I’d be doing, and it’s been a joy. It’s also a testament to the longevity of Victorian Nordock and NWN, that after all these years, there is STILL an active community here for this great game. None of which would be possible without Ari and Mike! =)
- Version 2.0
- Date: 24-08-2025
- Updated: Lots from v1, including chapter restructuring, new fletching/tailoring items, and several new sections.
For now, go dear reader. Stop standing around, and get crafting; those items aren’t going to make themselves!